Monday, October 31, 2022

Punny Masculine Tropical Christmas

 
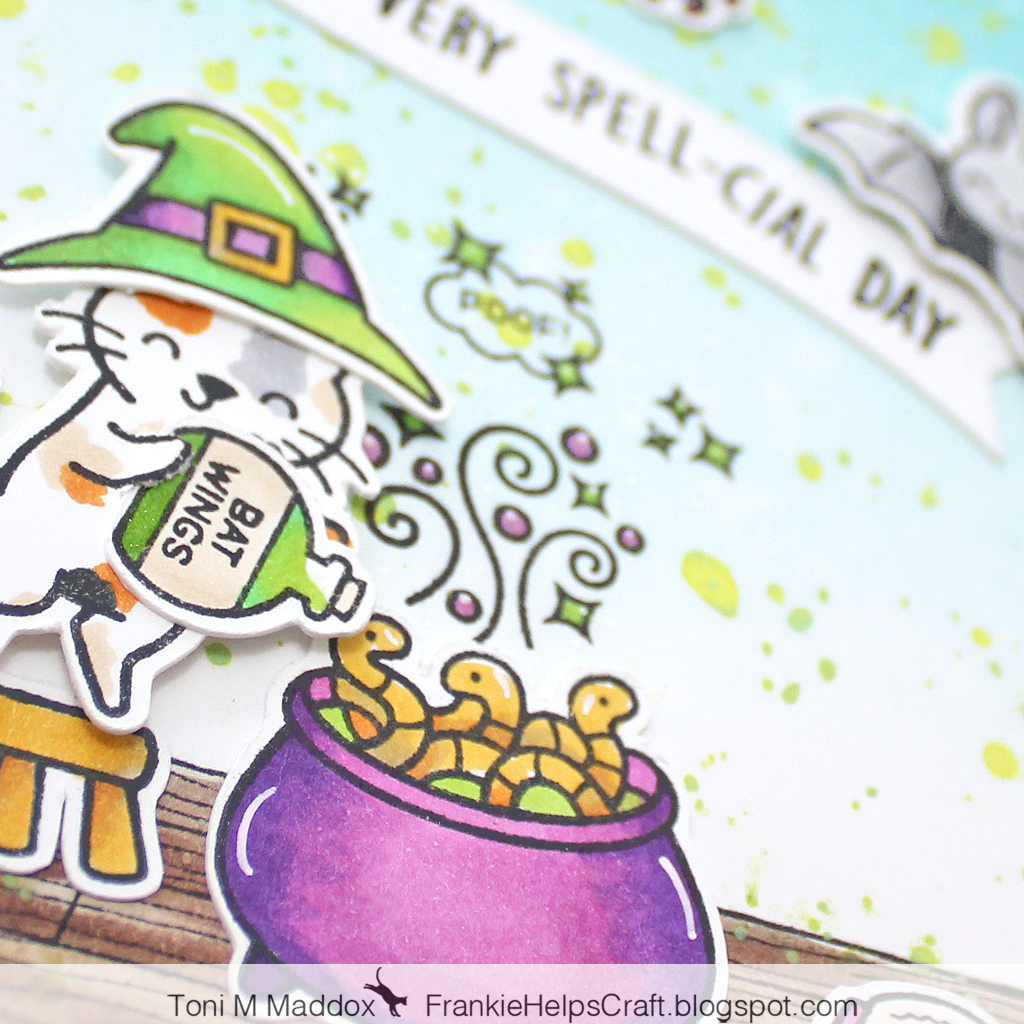
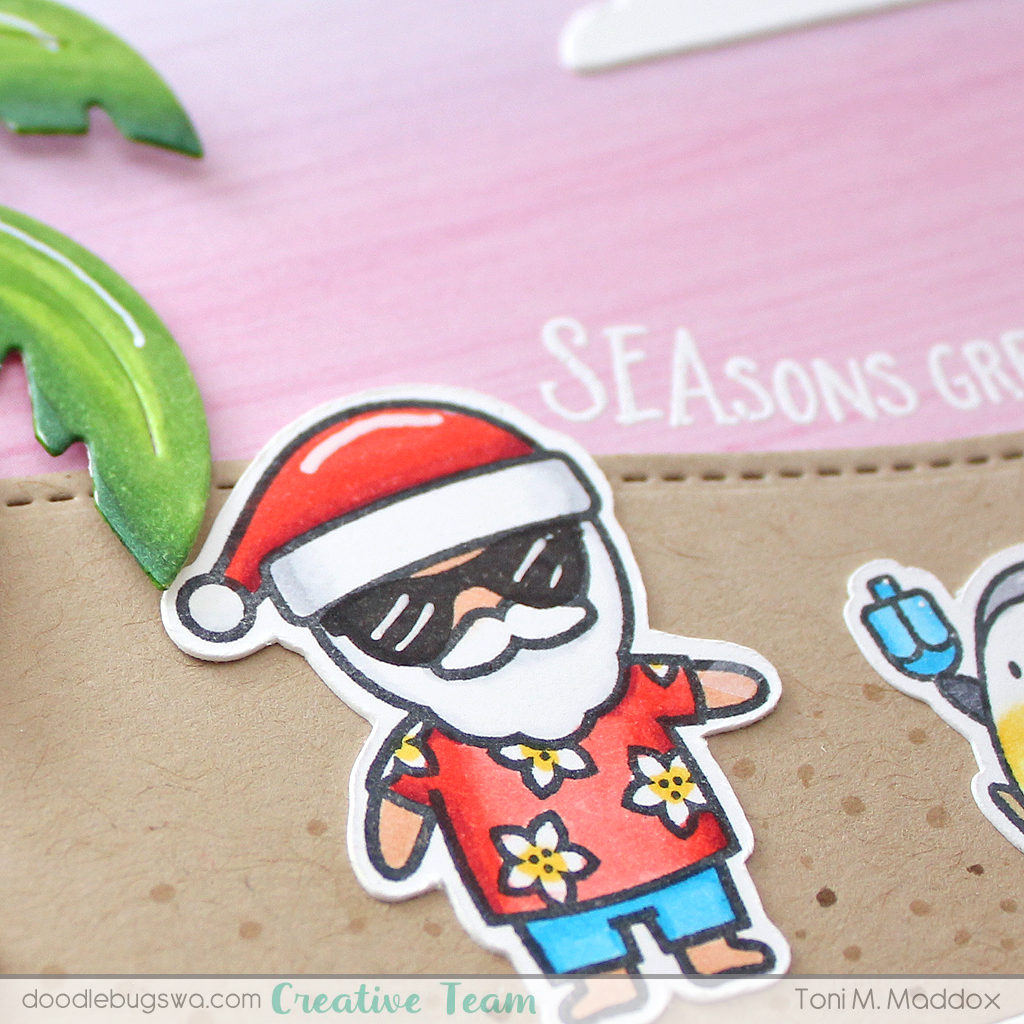
Hi, everyone!  Toni here with you today sharing a tropical holiday card with a ton of fun elements.


I started the card by cutting out the Sunny Studio Tropical Trees Background which accounts for the border, clouds and bird in my scene.  I used Honey Bee Team Tie-Dye 6x6 paper for the sky but easily could have sponged it instead.

I used the Lawn Fawn Stitched Hillside Border cut from kraft and dotted with Copics for sand.


I also colored up the Lawn Fawn Beachy ChristmasLawn Fawn Christmas Palm Tree and Mama Elephant Little Penguin Agenda images using Copics.  Just so cute!


I'll see you again soon.  If you'd like to check out my other creations in the meantime, you can visit my blog, Frankie Helps Craft, my Instagram, or my Pinterest Board.  Have a great rest of your day!

PRODUCTS USED AND/OR RECOMMENDED

Friday, October 28, 2022

Same design repeated - or is it?


Hello, my friends!  I'm here today to break my own card-making rule:
never repeat a design or card!

Let's be real - it's Christmas card-making time!!!  and I've run out of extra time
to get my cards ready for my friends at Bring Smiles to Seniors!

How will I top the 300+ cards I delivered last year???
Cut, blend, stack, repeat - that's how!
The fun begins with this sweet little Waffle Flower Crafts' Poinsettia again!
All of my layers are cut from 80# Neenah Solor White - it blends beautifully and you
can cut two blooms from one quarter-sheet!


Blending these petals was easier when I popped them back in the negative cut.
Then I choose some inks - the sets from Altenew are the best as they've taken all
the worry out of matching values of ink colors and they also work well with water!


I love variegated Poinsettias and these pink-to-reds in the Red Cosmos set are gorgeous!


My first design uses the Altenew Slimline labels and a leaf and sentiment 
that has been heat-embossed in Ranger gold.  
Pro tip: don't be afraid to mix your Christmas sets!  
I went looking for just the right sized sentiment
to fill that space and found it in another Waffle Flower set from a few years ago!

Next up - those gorgeous orange inks - did I convince you last week how 
beautiful those orange Poinsettias are?  This week they were blended instead of
daubed - is that a word?

I love Poinsettias but have no trouble imagining so many other flowers or ornaments
as the star of this design - can't you?


For this card I used a piece cut from an embossed half-panel from 
Spellbinders' - Ski Lodge - you'll see the rest of that story next week!


This design has another element in common: that gold sentiment!  This time I used one of the dozens I created using Spellbinders' Glitter Wishes!  It will be the common thread in many of the cards I make for Doodlebugs in the next few weeks - hope you'll come back!  
We appreciate it when you do!

=] Michele


Links to products used or recommended are listed below:  

Wednesday, October 26, 2022

Black and Cream Colored Christmas Cards....


Hello and happy Wednesday everyone. I am sharing a set of Christmas cards with you today using the lovely Mistletoe Wreath from Waffle Flower Stamps.  


I started by using the Peekaboo Pop-Up die set to create two card bases, one black, and one cream-colored one. I then used the  Mistletoe Wreath to die-cut several layers of wreaths from green-toned cardstock. I then heat-embossed the sentiment from the Magic Holiday Messages stamp set onto the black card base. For the cream-colored base, I used the Tag, You're It Holidays stamp set.


I then used the Christmas Blooms, and the Stitched Poinsettia die set to add the flowers, pinecones, and leaves to the wreaths. Next, I used the Stitched Circles Small and Stitched Circles Large to create the frame for the shaker area on the black card. 


I hope you enjoy the card I created to share with you today. Thank you so much for taking the time to stop by. I hope you each have a wonderful and blessed day. Please feel welcome to visit me on my blogIG or Pinterest.

Links to products used or recommended are listed below:   
 

Tuesday, October 25, 2022

Birthday Cats and Bats, Oh My!


Hi, everyone!  Toni here with you today sharing a super cute birthday card that's perfect for someone with an October birthday like my niece or just in general because it's too cute to spook!

I started the card by adding the MFT On Solid Ground Floor to the card front and watercoloring it with Zig 068.  I then sponged the upper portion of the front with Distress Oxide Peacock Feathers then spattered the lot with Twisted Citron and water.


Next I went to happy spooky town coloring up the Lawn Fawn Purrfectly Wicked & Add-On and Lawn Fawn Fangtastic Friends & Add-On images with Copics (so much fun that I forgot to take a pic of the Copics I used--oops!).

I think this card is taken up a notch with the little details:  the worm on the book, the cauldron sparkles leading the eye up to the Lawn Fawn Simple Wavy Banner the bats are in the midst of hanging, the Mexican red-knee tarantula, etc. Bam!


I'll see you again soon.  If you'd like to check out my other creations in the meantime, you can visit my blog, Frankie Helps Craft, my Instagram, or my Pinterest Board.  Have a great rest of your day!

PRODUCTS USED AND/OR RECOMMENDED

Monday, October 24, 2022

Simple Diecuts for Holiday Cards


Hi, everyone!  Toni here with you today sharing a card that would be perfect to make multiples of for the holidays.  Imagine how easy it would be to change the colors or placement of the diecuts, or the sentiment, so each card can be unique.  Cool!


I started the card by diecutting the Honey Bee Barn Wood Planks in kraft and adhering them to the card base.  I next cut out a white panel using the Lawn Fawn Flippin' Awesome Add-on.

I cut out a few Waffle Flower Layered Winter Bird sprigs as well as the birds.  


To add more depth to the scene, I used the diecut negative of the sprigs as a stencil. I sponged the lot with Distress Oxides.

I used the Spellbinders Mini Christmas Sentiment Strips Hot Foil Plates with gold for the sentiment and nestled that among the birds. 


I'll see you again soon.  If you'd like to check out my other creations in the meantime, you can visit my blog, Frankie Helps Craft, my Instagram, or my Pinterest Board.  Have a great rest of your day!

PRODUCTS USED AND/OR RECOMMENDED

Friday, October 21, 2022

Layers of Holiday lovelies!

Hello, my Doodlebugs friends!  Michele here again where I'll be in serious
Holiday card-making-mode now!  I'm way behind so let's get into it, shall we?

Waffle Flower added this gorgeous Layered Poinsettia die set to their shop in
2021 and I'm so happy that Doodlebugs had it for me! 

Poinsettias happen to have
a special place in my heart - and they come in so many glorious colors!
Today's shades of orange come from a gorgeous photo my friend shared with me recently!
She found these at her Kroger store! I couldn't wait to recreate them!


First, I used those layering dies to cut enough for two blooms from watercolor cardstock.  Altenew to the rescue with this set of Warm & Cozy mini-ink cubes which I 'smooshed onto
my glass-mat and picked up with a wet brush - just really simple dabbing will do for
this mottled look.  Gluing and fluffing the layers and voila!


You'll notice that I've used that Altenew Slimline label again -
this time as the perfect place to plant my orange Poinsettia and
a heat-embossed sentiment from Waffle Flower's Oversized Joy.
There's a NEW coverplate in my studio - Spellbinders' Stitched Diamond Argyle!
I've left it unstitched and think it gives just the right amount of interest to
my card front without trying to steal the show!

A sprinkling of HoneyBee Warm Pearls and my job here is complete!

Thanks for stopping by! Hope your holiday card-making is going well?  I'd love to know if you create more than one of a kind.  Or is each card custom created for the recipient?  I seldom make more than one of each design - but I'm changing that for next week's card[s]!

See you then?

=] Michele

Links to products used or recommended are listed below:  

Wednesday, October 19, 2022

Snowman-Themed Holiday Card...


 Hello and Happy Wednesday everyone! I am sharing this fun Snowman-themed card with you today. I used the super cute new Build-A-Snowman die set from Lawn Fawn. 


I began by die cutting the layers to create the  Build-A-Snowman die set. I also used the mug from the Woodland Critter Huggers Winter Add-On to create the little 'snowman mug'. I deepened the red color on the printed paper for the scarves using Derwent Inktense Pencil in Poppy.


Next, I used the Basic Rectangles to die-cut the base layer of the card using the patterned paper from the Knit Picky Winter 6x6 paper pad. I then die-cut a smaller layer using the Backdrop Stitched Snowflake die. I added color to this layer using Salvaged Patina Distress Ink and Peacock Feathers Distress Oxide ink. 


I then heat embossed the sentiment onto a piece of cardstock using the sentiment from the Happy Tags Holiday stamp set from Avery Elle. I then used the die from the Giant Birthday Messages set to die-cut the sentiment. I also used the die from the Giant Holiday Messages set to add the scalloped layer to to the sentiment.

I hope you enjoy the card I created to share with you today. Thank you so much for taking the time to stop by. I hope you each have a wonderful and blessed day. Please feel welcome to visit me on my blogIG or Pinterest.

Links to products used or recommended are listed below:  

Tuesday, October 18, 2022

Tea-rrific Birthday Greetings


Hi, everyone!  Toni here with you today sharing a bonus card; I've been on a creative roll!

I used a variety of Lawn Fawn stamps, dies and 6x6 papers to create the cutest birthday scene.  The papers included LF Rainbow Perfectly Plaid and Spring Fling. 


Notice how I enhanced the Lawn Fawn Stitched Hillside Border and Stitched Tree Border layers by brushing on Distress Oxide Rustic Wilderness between them?

For the images, I used the Lawn Fawn Tea-riffic Day set and will someday get the Add-on which would have been perfect for this card.


I'll see you again soon.  If you'd like to check out my other creations in the meantime, you can visit my blog, Frankie Helps Craft, my Instagram, or my Pinterest Board.  Have a great rest of your day!

PRODUCTS  USED AND/OR RECOMMENDED

Monday, October 17, 2022

Mailing Merry Wishes


Hi, everyone!  Toni here with you today sharing a card that has so many fantastic layers with bits and bobs to make it total eye candy.

I adhered the Lawn Fawn Snow Flurries Backdrop onto the card base before working up the Spellbinders Parcel & Post Mailbox and placing it on top.  Notice the shadow I added using Copics?  I don't have a lot of brown tones in my cardstock collection so this was my solution.


I filled the mail slot with various bits from Spellbinders Parcel & Post Christmas DecorationsSpellbinders Holiday Blooms, and even the present from Spellbinders Dancin' Snowman.  I swear figuring out the placement of all that was the longest part of the process.


I hot foiled the Spellbinders Christmas Mailbox Greetings Hot Foil Plate in red and used the included die to cut it out.  I was impressed with how well the sentiment foiled; I had been afraid it would have some leftover along the edges or something but not a spot of that at all.  Woo hoo!

I finished off the card using Stickles Star Dust and Pinkfresh Studio Gold Metallic Pearls.  Can't have enough gold or glitter in life, that's for sure. Btw, I used glitter cardstock for the poinsettias and sponged the sprigs with Distress Oxide Peacock Feathers.


I'll see you again soon.  If you'd like to check out my other creations in the meantime, you can visit my blog, Frankie Helps Craft, my Instagram, or my Pinterest Board.  Have a great rest of your day!

PRODUCTS USED AND/OR RECOMMENDED

Friday, October 14, 2022

Falling for leaves from HoneyBee please!


What do you get when you start with a simple rectangle of bright yellow cardstock, cut it with an Autumn Splendor cover plate, then blend, blend, blend these gorgeous Autumn-toned inks?  Keep reading...


This is what you get...


I just couldn't bear to cover much of it up!  Enter Pinkfresh Studios Perfect Sentiments stamps and die!  I heat embossed it in gold on dark grey cardstock - just like that card base.  Right now, I'm imagining myself on a forest floor gazing up at Autumn's splendor... how about you?

Hope you bring some Autumn into your craft space this weekend!  Enjoy!
=] Michele


Links to products used or recommended are listed below: