Friday, November 29, 2019

Friday with Amy: Honey Bee Stamps | Fall


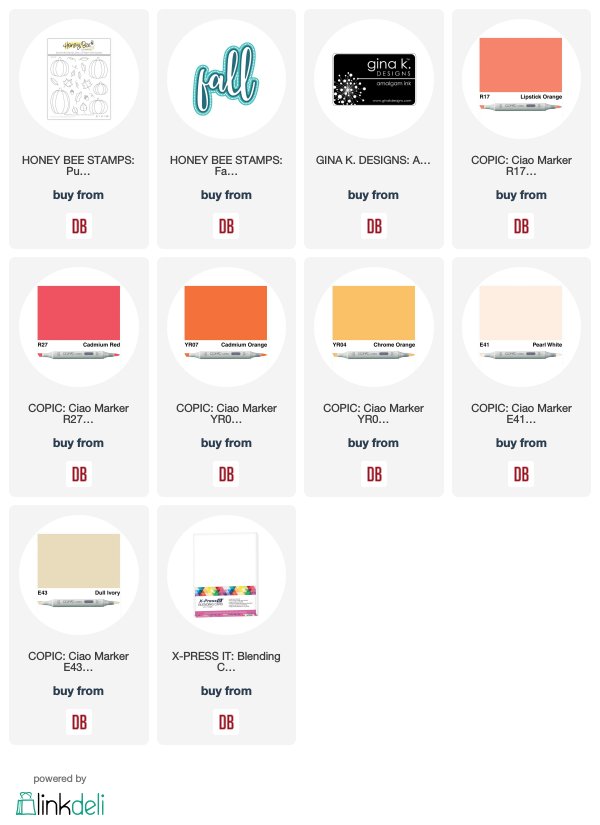
Hey everyone, happy Friday!  It's Amy and I'm wondering if anyone else recovering from food overload?  Honestly I was thinking of pumpkin pie when I was coloring my card today that features Honey Bee Stamps:


I had so much fun planning out my card for today.  Thank goodness for my MISTI's.  I prefer my MINI but will hop over to my regular one when I need the extra wiggle room, like I did for today's design.  I randomly stamped the images from the Pumpkin Patch stamp set with Gina K Designs' Amalgam Jet Black Ink.


I was going to keep my overall palette in reds, orange, yellow but I decided to add a bit of green, my favorite color.  I used the following copics:

R17 | R27
YR07 | YR09
YR04 | YR12
G43 | G82
E41 | E43


I colored the background with my E41 + E43.  I don't generally do that but the white was just too bright and I wanted to warm up the design a bit.  

Isn't the Fall Honey Cuts so fun?  I love that it is a layering die with detail work.  

My card was inspired by the Stamp Ink Paper Challenge:


Don't forget about the BLACK FRIDAY SALE going on NOW:


Links to supplies used can be found below:


Thursday, November 28, 2019

Bonus Day with Toni: Avery Elle Polar Playtime


Hello, everyone! Only 3 more weeks until Christmas, can you believe it? I always intend to make enough Christmas cards and usually reach my goal but I don't think I've mailed them all out on time so I like to make a few winter cards to account for that. Shh, our secret.


For this slider card I'm using the Avery Elle Polar Playtime images on a background using Avery Elle Holiday Collection 6x6 Paper.


I cut the front panel twice--once in the patterned paper and again in white so I could create a snowy hill using Lawn Fawn Stitched Hillside Borders. The Lawn Fawn Slide on Over die cut through both layers easily.


I colored up the image using Copics and adding details using a Sakura Gelly Roll White Pigment Pen.

I also stamped the Sunny Studio Feeling Frosty sentiment on the snowy hill using Versafine Onyx Black.


I assembled the slider in the prescribed way (video here). Note I used two of the circular MFT Spin and Slide Discs side-by-side as I couldn't find my oval ones.  If I had used only a single circular disc, the sledders would have rolled rather than slid down the hill.  In my case:  accurate.


If you'd like to check out my other creations, you can visit my blog, Frankie Helps Craft, my Instagram, or my Pinterest Board.

Links to supplies used are listed below:

Tuesday, November 26, 2019

Tuesday with Toni: MFT Christmas sELFies


Are those of you in the US looking forward to Thanksgiving and for some of you a 4-day weekend? In my case, a 4-day crafting weekend. Be still my heart!


Let's get this crafting mega week started off right with a couple of cute cute cute cards using MFT Christmas sELFies, the MFT Peace, Love and Joy Stencil, and the MFT Polaroid Shaker Frame


I sponged Distress Oxides through the MFT Peace, Love and Joy Stencil--the first using only Peacock Feathers and the other using Peacock Feathers, Wilted Violet, Picked Raspberry, and Mustard Seed rainbow style.


I stamped all of the images with a Copic-friendly ink and colored them with Copics.


I love how the background of the Santa and reindeer images matches Peacock Feathers so well. Notice how the background image was stamped and masked before sponging the stencil. It's a good way to keep the layers down for mailing.


The snowmen image on the second card used fewer Copics, of course. Snowmen, yeti, polar bears,  and penguins are my go-to quick color images for the holidays.


I did add some paper-pieced scarves to the snowmen using Doodlebug Designs Christmas Magic 6x6 Paper. I chose those papers after I stenciled the background. How cool is that matchy matchness?


If you'd like to check out my other creations, you can visit my blog, Frankie Helps Craft, my Instagram, or my Pinterest Board

Links to products used are listed below:

Friday, November 22, 2019

Friday with Amy: Pretty Pink Posh | Grateful


 Hi and Happy Friday!  It's Amy and I'm sharing a duo featuring Pretty Pink Posh:

Grateful Shaker Die
Pumpkin Background Stencil

Here's a peek at both of my projects.  They each use both of the products a bit differently.


My intention wasn't to actually post two cards today but my second card had glitter paste that had to dry.  So, I decided to whip up another card while I waited for my background to dry.

With my first card I used the Pumpkin Background stencil with some orange dye ink on white cardstock.  I love gray with everything so this card is a 4.25 x 4.25 card with a gray base.  The Grateful Shaker Die was cut in the same gray as the base.


Both of my designs use the 'shaker die' as a regular die.  I decided to go that route since both backgrounds are pretty 'busy'.  

My second card uses a dark orange panel and white glitter paste.  Oh boy, you should see the awesome texture and glitz on this one!


I decided to to cut the grateful die in a lighter gray and mount everything on a darker gray.

I'm loving that both cards are postal friendly!  No foam adhesive, which is rare for me.

That's it for me, happy weekend!

Links to supplies used are listed below: 

Thursday, November 21, 2019

Bonus Day with Toni: Lawn Fawn Woodland Critter Huggers


Umm, I hope you're not sitting down because you're going to need to hop up and down to celebrate the cuteness of today's card.  Shoot. I'm hopping up and down writing this post! LOL.

The Lawn Fawn Woodland Critters Huggers die is a surprisingly versatile set. I tend not to buy dies like this but talk about bang for my buck.

With the base set you can make a:
  1. Deer
  2. Squirrel/Chipmunk
  3. Raccoon
  4. Owl
  5. and, Fox.
And with the add-ons you can holiday them up all sorts of ways. Swoon!!!!


I cut out my deer base elements in white and sponged them with Distress Oxide Vintage Photo. I colored the ears and nose with Copic E49 and sponged the cheeks with DO Spun Sugar.


I cut out the Lawn Fawn Critter Huggers Winter Add-on pieces using Avery Elle Holiday Collection 6x6 Paper. Can this deer get any cuter??? Yes!  Check out the enamel dot eyes and lashes I added using a Copic 0.3 multiliner.


I cut the card front from Lawn Fawn Snow Day Remix 6x6 Paper using a Lawn Zig Zag Rectangle. The Lawn Fawn Winter Wavy Sayings sentiment is stamped with Versafine Vintage Sepia onto a Lawn Fawn Simple Wavy Banner.

The little mug of cocoa is colored with Copic N0, N1 and R08. That's adhered to the deer's chest.  The mitten hands are adhered together separately--notice how they pop up naturally?  Love!


If you'd like to check out my other creations, you can visit my blog, Frankie Helps Craft, my Instagram, or my Pinterest Board.  

Links to supplies used are listed below:

Tuesday, November 19, 2019

Tuesday with Toni: Lawn Fawn Yeti or Not


Christmas is coming and I am in full on holiday card making mode. My fav!  It's so hard to choose which cute set to work with next but I didn't have a problem choosing these ultra cute Lawn Fawn Yeti or Not images.  I made the card and a matching gifty.  Read on!


I chose the background paper from the Lawn Fawn Snow Day Remix 6x6 Pad. Looks so fancy and yet all I did was glue it down!

The other patterned paper elements are from the same pad, including the hat from Lawn Fawn Tiny Gift Box Holiday Hats Add-on and the snowbank using a Lawn Fawn Stitched Hillside die.


I colored up the yetis in a jiffy using Copics. I added a bit of shading behind the brim of the hat too.


As final touches I dotted the background with a Sakura Clear Glaze Pen. The Lawn Fawn Wavy Sayings sentiment is stamped with Versafine Onyx Black onto a Lawn Fawn Simple Wavy Banner and popped up with Scotch Foam Tape.

No photo description available.

For the gift project, I stamped the Lawn Fawn Yeti or Not images with Stazon Jet Black onto Grafix white shrinking plastic. I colored them with Copics in like 2 seconds (avoid touching Stazon with your Copics!). Before shrinking I cut the hole then had at them with my heat gun.


Isn't the mini me cute? I could envision using them as a card embellishment, a charm or as earrings as I did.


Now check out this CAS (Clean and Simple) yeti card I made for a card challenge a few weeks ago. Amazing how different cards can look using the same set, isn't it?


If you'd like to check out my other creations, you can visit my blog, Frankie Helps Craft, my Instagram, or my Pinterest Board.

Links to supplies used can be found below:

Friday, November 15, 2019

Friday with Amy: Mama Elephant | Warm Winter Fuzzies


Yay for Friday!  It's Amy and I'm sharing a fun Mama Elephant card that features:


Here's how I was inspired:


Let's start with the pattern paper.  It's from the Honey Bee Stamps - Harvest Festival.  The sentiment is from Snow Friends.  It has been heat embossed with Hero Arts White Embossing Powder.


Okay, the Mama Elephant Penguin?  So cute!  Rather than using colored cardstock I decided to die cut everything  in white and use copics to customize the colors.  I decided I wanted her to be peach colored because, well, why not?

So the fish bowl in the Penguin Creative Cuts?  I flipped it upside down and BOOM - a snowglobe.


I stamped the snowman from the Snowglobe Bitties and trimmed him down to fit in his new home, the snow globe.  

I think she turned out pretty cute, how about you?

The copics I used:

E000 | E30
N0 | N3
W00 | W3

Thanks so much for stopping by!

Links to supplies used are listed below:
 

Thursday, November 14, 2019

Bonus Day with Toni: Sunny Studio Feeling Frosty Shaker


How are you today, everyone? Today I have a cute shaker card using Sunny Studio Feeling Frosty.


I stamped the card base using two of the Sunny Studio Feeling Frosty sentiments and lots of Distress Oxides. I used the grid of my MISTI to help keep everything aligned but used a regular acrylic block for stamping.  I used the same Distress Oxides to add little snowflakes and such from that set.


Next I cut out the Lawn Fawn Ready, Set, Snow snow globe die and sponged it with DO Picked Raspberry.

I created a Scotch Foam Tape barrier on the back of the snow globe after adhering my acetate. I placed a little pile of glitter on the card front and carefully placed the snow globe. I pressed firmly all around to ensure the foam tape was secure before shaking.  If your foam isn't all the way down or has a gap at all, the glitter will come out and make a horrible, horrible mess. Ask me how I know.


I stamped and colored the Sunny Studio Feeling Frosty images using Copics. The Lawn Fawn Ready, Set, Snow sentiment is stamped using Versafine Onyx Black.  Didn't this turn out cute? Super fun to shake too!


If you'd like to check out my other creations, you can visit my blog, Frankie Helps Craft, my Instagram, or my Pinterest Board.  Until next week, my friends!

Links to supplies are listed below: