Monday, May 30, 2022

Creating a Dynamic Underwater Scene


Hi, everyone!  Toni here with you today sharing a fun nautical hello.  Bloop bloop!

I started off using the leftover Mama Elephant Big Scripty Hello from a scene I had created last year-ish. I couldn't let that gorgeous sponged diecut go to waste, now could I?

It had been sponged with Distress Oxide Salty Ocean, Peacock Feathers, and Salvaged Patina.


I next used the Sunny Studio Tropical Trees Backdrop for the frame and sand.  I sponged the latter with Distress Oxide Vintage Photo.

I stamped out a few of the Sunny Studio Ocean View and Fintastic Friends images, coloring them with Copics.


Finally, I stamped out one of the Sunny Studio Fintastic Friends sentiments on a Lawn Fawn Everyday Sentiment Banner and placed it over the walrus/manatee. 

I think one of my fav parts of the card is how the stingray is gliding through the hello.  Just so cute!


I'll see you again soon.  If you'd like to check out my other creations in the meantime, you can visit my blog, Frankie Helps Craft, my Instagram, or my Pinterest Board.  Have a great rest of your day!

PRODUCTS USED AND/OR RECOMMENDED

Friday, May 27, 2022

Sunny Studio Lilacs are blooming!

Hello, my Doodlebugs friends!  Michele here again - a highlight of my week, for sure!

Today, I'm delighted to be stamping some gorgeous layered Lovely Lilacs from Sunny Studio!  You won't believe it! this is my very first use of Sunny Studio products!  I KNOW - under a rock is where you would find me!  lol I've rectified that situation beautifully today!


I thought the Altenew Shades of Purples perfectly paralleled
the color of the new little Lilacs planted last year in my own garden!


  • What better way to draw the eye to these gorgeous, layered lilacs than to add a Pinkfresh Stitched Scallop frame?  This is the largest of the two in the set.
  • Adding interest to an otherwise plain background is this gorgeous Sunny Studio Wood Grain embossing.
  • A sweet little hello stamped onto the smallest circle from Sunny Studio's Stitched Circles dies.


If cutting armfuls of lilacs is on your agenda this weekend, you're a lucky one - but I'm happy to leave them for the bees - these gorgeous layers stamped make me happy!  If only they smelled the same

=] Michele

Links to products used or recommended are listed below:
Wednesday, May 25, 2022

Let's Celebrate You with My Favorite Things...


Hello and happy Wednesday everyone. I am so happy to be sharing this fun card using the super awesome BB Birth-Yay stamp set from My Favorite Things. 


I began by coloring the image using Copic markers.
Green: YG01, YG03, FYG2, YG17, G05, G09
Blue: B28, FB2, B24B32
Yellow:Y11, Y08, Y19, YR24
Orange: YR12, YR04
Gray: W1, C3, W5, W7, C9
Brown: E50, E31, E55, E35

 I then used the Backdrop Peppermint Stripes die to die cut the backdrop from white cardstock. Next, I glued it to a kraft colored card base. 


I then used the grass portion from the Nature Essentials Die for the grass area for the card. Next, I used the Giant Holiday Messages and Giant Birthday Messages dies to create the scalloped base for the sentiment. I heat embossed the sentiment from the BB Birth-Yay onto the die-cut oval and then layered the 'Hooray' phrase on the center. 


 I hope you enjoy the card I created to share with you today. Thank you so much for taking the time to stop by. I hope you each have a wonderful and blessed day. Please feel welcome to visit me on my blogIG or Pinterest.


Links to products used or recommended are listed below:

Monday, May 23, 2022

A Special Birthday for an Old Goat


Hi, everyone!  Toni here with you today sharing a super cute birthday card for that special goat in your life. I mean guy in your life!  LOL.

My partner is always intrigued with my interactive cards so I rather went all out with this one. 


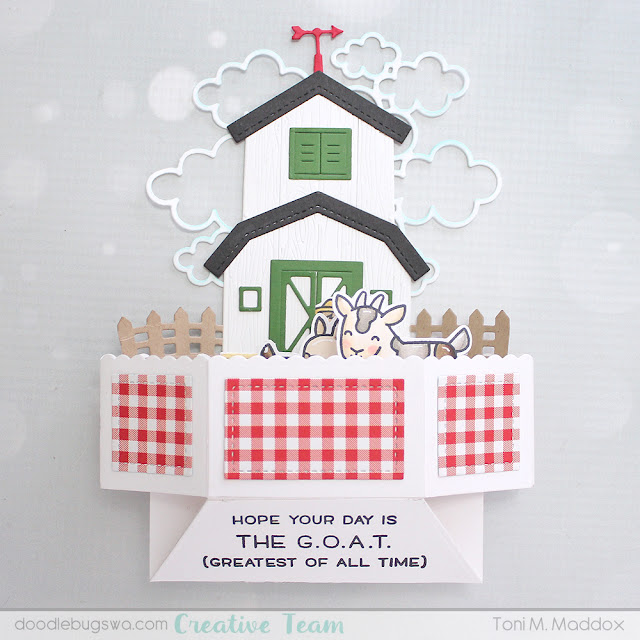
The Lawn Fawn Platform Pop-Up dies are really easy to use and as always there's a helpful video you can watch. This one isn't as fiddly as some of the other interactive dies I've used; I don't even think I'll need to rewatch the video in the future to use it again.

I assembled the Lawn Fawn Platform Pop-Up per the video, adding the Doodlebug Design gingham around the perimeter except for the very back to leave room for a personal message. 

NOTE: If you wish to add a sentiment to the bottom as I did, you'll want to do that before assembly or else the interior mechanism will interfere with the stamping (ask me how I know!).


I cut out the hill and 2 of the grass dies included in the set. I trimmed a bit off the bottom of the hill and middle grass diecuts so when you look at the card straight on, there's height differential.

I added the Lawn Fawn Build-a-Barn to the very back of the pop-up.  Take a closer look at the barn. I used the Honey Bee Barn Wood Planks dies to give it a woodgrain texture.

I added some Lawn Fawn Little Picket Fence Borders on either side of the barn.


Next I colored up the Lawn Fawn You Goat This and Lawn Fawn Tiny Farm images using Copics.  I also added dots of color to the top of the platform to represent dirt. 

I used liquid glue to adhere the images to the various layers as the pieces are quite small so that seemed easier than my beloved Scor-Tape.


Behind the barn I added the Waffle Flower Outlined Clouds lightly sponged with whatever blues were leftover on my brush.

I then adhered a second barn I had cut out in plain white to hide the "uglies" and give me a spot to add the Lawn Fawn Berry Special sentiment.


I'll see you again soon.  If you'd like to check out my other creations in the meantime, you can visit my blog, Frankie Helps Craft, my Instagram, or my Pinterest Board.  Have a great rest of your day!

PRODUCTS USED AND/OR RECOMMENDED

Friday, May 20, 2022

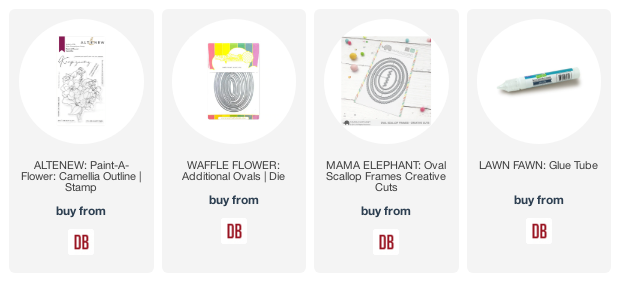
Altenew Paint-a-Flower on an Oval Card!

Helloooo, and thanks for stopping by today!  Michele here today with a fun shaped card, and my newest addition to my Altenew Paint-a-Flower stash:  Camellia!


I've stamped it onto a Copic friendly cardstock, with Copic friendly grey ink
then picked a few Copic colors based on this gorgeous photo I found on
the interweb... my favorite way to find color variations of flowers!


Really simple coloring using the darker shades where shadows fall and leaving just the tiniest bit of white near the tips of the petals.  It could have all gone wrong quickly when adding the flicks of bright RV09 but it's only paper - I can always start again!  

After all my coloring was done, I cut it using an oval die from Waffle Flower Crafts.  I also created an oval card front 1/2 inch larger, that fits over an oval card base cut using the same die - only dropped down from the top fold just a bit.  It will stand just fine if you snip a little 'flat' spot from the bottom of the back panel, too.


OH, if you snip between the words of those tiny sentiments, 
you can bend/curve them to fit just about anywhere!
Stamping it on acetate first helps get that curvature right.


I just love the sentiments in this set.  The main sentiment was stamped in that same grey and fussy-cut before popping it up just a touch.  Don't you just love those little blue berries among this bouquet?

Altenew has also just released a Camellia Coloring Stencil for this set!  

=] Michele

Links to products used or recommended are listed below:
Wednesday, May 18, 2022

Camping-Themed Father's Day Card...


Hello and happy Wednesday everyone. I am sharing this fun card using the cute Tiny Friends, and Tiny Spring Friends stamp sets from Lawn Fawn to create this Father's Day card. 


I began by coloring the images I would use to create the camping scene. I used Copic markers. The trees are from the Winter Village, and Car Critters Christmas Add-on stamp sets. The camper and car from the Happy Trails set, the rocks from You Are Sublime and Ocean Shell-fie sets, the 'tent' is the book image from the Book Worm set, the flame for the fire is from the S'more the Merrier set. 


Next, I used the Shadow Box Card die to create the card. I used Distress Oxide inks to add a bit of color to the grass and ground areas. I then die-cut the letters using the Henry's ABC's die set to create the word 'dad' . Next, I die-cut the banner from the Wonky Stitches die set and then heat embossed the sentiment from the Plane and Simple stamp set onto the banner.  


I hope you enjoy the card I created to share with you today. Thank you so much for taking the time to stop by. I hope you each have a wonderful and blessed day. Please feel welcome to visit me on my blogIG or Pinterest.

Links to products used or recommended are listed below:


Monday, May 16, 2022

Unisex Sympathy Card

Hi, everyone!  Toni here with you today sharing a simple sympathy card in a neutral and natural palette. I find sympathy cards among the hardest to design and usually go with something from nature.

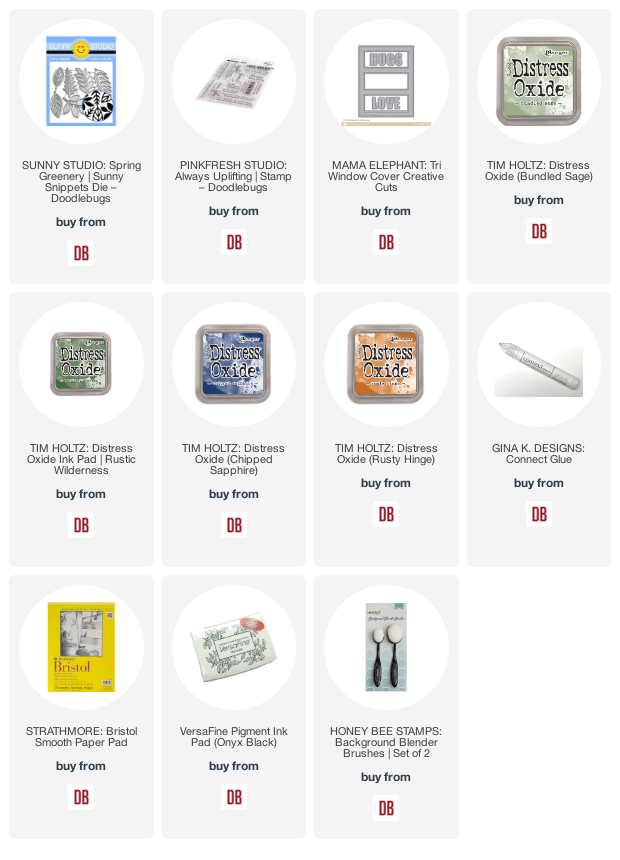
For this card, I first cut out the Mama Elephant Tri Window Cover so I could use those rectangles, saving the border part for a later project.

I sponged the rectagles with Distress Oxide Chipped Sapphire, Rustic Wilderness, and Bundled Sage for a calming ombre effect.  I then spattered the lot with water.


I used the leftover border portion to help me figure out where to stamp the Pinkfresh Studio Always Uplifting sentiment which I had masked to use only the top line.  I did this prior to affixing the rectangles to the card base as the rectangle would interfere with making a clear stamping.

Next I diecut the Sunny Studio Spring Greenery ferns and sprayed them with Dina Wakley Tangerine Gloss Spray.  I could have easily used Distress Oxide Rusty Hinge for a similar effect.


I'll see you again soon.  If you'd like to check out my other creations in the meantime, you can visit my blog, Frankie Helps Craft, my Instagram, or my Pinterest Board.  Have a great rest of your day!

PRODUCTS USED AND/OR RECOMMENDED

Friday, May 13, 2022

Altenew stamps, dies, and butterflies!


Happy weekend-eve, Doodlebug friends!  My husband and I are celebrating our 27th wedding anniversary today - for those that know us, you'll also know that having a butterfly on my card is quite appropriate for the day.  My husband lovingly collects tiny little Monarch butterfly eggs to safely 'bloom' them in an enclosure on our front porch! We've added hundreds and hundreds of Monarchs back into nature each year for the last 10 years or so!

Altenew's Leaf Clusters stamps, and coordinating dies helped me create a beautiful environment for this sweet little Dream Big butterfly to land!  Here is how it all came together:


First by determining which branches I wanted in the forefront
then stamping and die cutting them from this 4 x 8.5" panel.


Next, choosing the background branches, and ink colors and stamping
them right over the top of those cuts.


Since my final layers are in shadow, I chose Soft Lilac
to ink them, a soft lavender foam to back my die cuts,
and soft lavender paper to back the panel:


The final touch?  a few Pinkfresh Studio jewels, this lovely butterfly,
and from that same set, a sentiment to live by!
NEWS!!  Doodlebugs just added the Slimline Apothecary Labels set!  
I can hardly wait to make it my own!


I hope you spend the weekend with someone you love doing something that makes you happy - thanks for stopping by!
=] Michele
 
Links to products used or recommended are listed below: 

Wednesday, May 11, 2022

Oh Snap...It's Your Birthday...


Hello and happy Wednesday everyone. I am sharing this super fun, masculine card with you today using the fun Oh Snap stamp set from Avery Elle. 


I began by coloring the image using Copic markers. 
Green: YG01, YG03, FYG2, YG17, G05, G09, G28
Blue:B28, FB2, B24, B32
Yellow:Y11, Y08, Y19, YR24
Orange: YR12, YR04


I then used the stitched rectangles from the Basic Rectangles die set to die cut the matted base layers for the card. Next, I die-cut the grass using the grassy layer from the Pretty Pink Posh Nature Essentials die. I then added a bit of color to the grass using Twisted Citron, Mowed Lawn and a bit of Lucky Clover.


Next, I used the Henry's ABC's die set to die-cut the phrase ' Oh Snap'. I then added a bit of color to each of the letters using Mustard Seed for the yellow letters, Fake Tan over the orange letters, and  Twisted Citron, Mowed Lawn and Lucky Clover over the green letters. I then heat embossed the sentiment from the Oh Snap stamp set onto a strip of vellum. I hope you enjoy the card I created to share with you today. Thank you so much for taking the time to stop by. I hope you each have a wonderful and blessed day. Please feel welcome to visit me on my blogIG or Pinterest.


Links to products used or recommended are listed below:

Monday, May 9, 2022

Throwback Videogame Themed Card

Hi, everyone!  Toni here with you today sharing a card that's a throwback to the 80s. Oh, what fond memories!
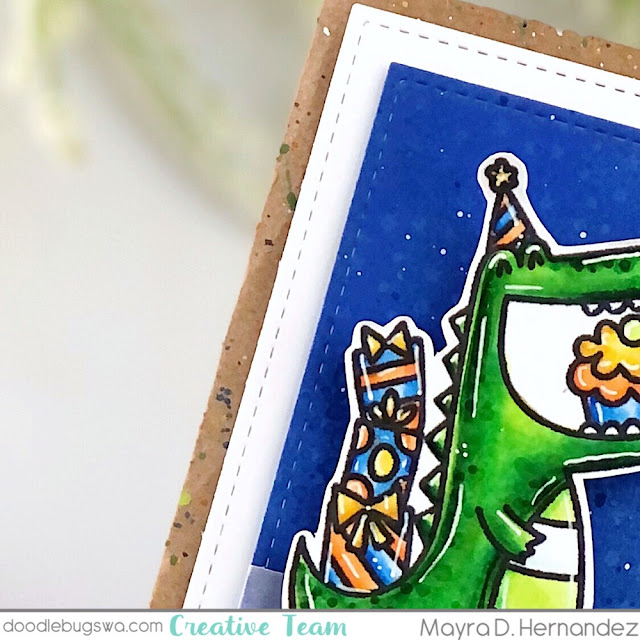

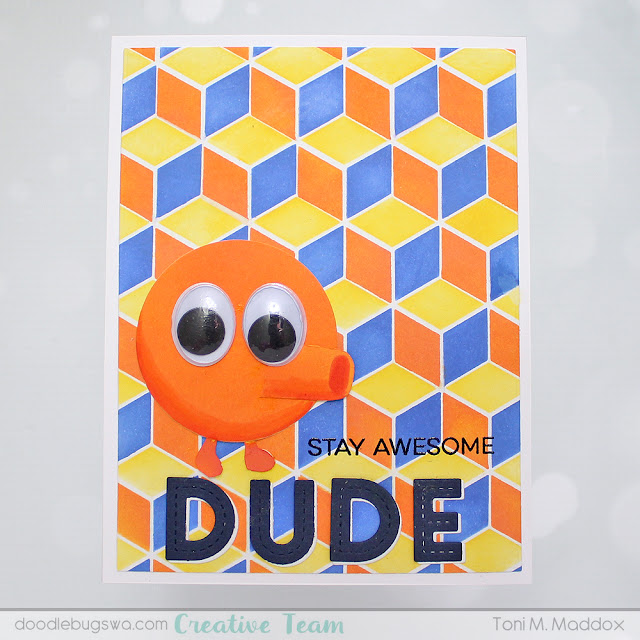
I'm definitely a child of the 80s as the moment I saw the Pinkfresh Studio Geo Blocks Layered Stencils I thought about Qbert on the Atari. I was a Pacman and Frogger girl myself but certainly gave Qbert a chance.

Of course, it's not like I have a Qbert stamp lying around so I worked up my own version using a circle die, hand drawn nose/mouth and feet, and giant googly eyes which--yes--I had in my stash.  This is why I like buying multi-size packs of things!  LOL.


I gave him just a touch of shading with Copics over the Distress Oxide. Btw, I don't recommend making that a common practice, but a quick swipe from time to time hasn't harmed my Copics that I can tell.

To finish the card, I embossed the MFT Essential Sentiment and diecut "DUDE" out of navy cardstock using Lawn Fawn Oliver's Stitched ABCs.


Now time to wait for the perfect moment to give this to a coworker who is a huge 80s fan and tech guy.

I'll see you again soon.  If you'd like to check out my other creations in the meantime, you can visit my blog, Frankie Helps Craft, my Instagram, or my Pinterest Board.  Have a great rest of your day!

PRODUCTS USED AND/OR RECOMMENDED