Tuesday, April 30, 2024

100% Sweet

 I'm back with my card 2 of 2 from last week. What does that mean? I used one background panel for two different cards.  Here's this week's version:


I love to stretch my supplies and that center ink blended panel is the negative cut from last week's design.  I couldn't bear to toss it so I made it the focal point of a skinny card - 3.5 inches x 5.5 inches.

 I used the same supplies for both cards:
  • Mama Elephant - Boxed Drinks | stamps + creative cuts
  • Pretty Pink Posh - Sentiment Strips: Birthday | stamps

The sentiment has been heat embossed in white on a kraft strip of cardstock.  Have you tried the Lawn Fawn - Crunchy Leaf ink?  I took a tip from my teamie, Amanda.  I love it and it is copic friendly.  Perfect to use with those soft pastel colors.


I'm on a mission this year to really build up a good Birthday stash.

Thanks for stopping by!
 
 Links to products used or recommended are listed below: 

Monday, April 29, 2024

Birthday Balloons on Balloons

Hey friends! It's Amanda from Twiddler's Nook with another Mix it up Monday. You can never have too many birthday balloons. Am I right?!? Well, I don't think so. So when I had the chance to ink up the adorable Mama Elephant It's Poppin, I had to pair it with my favorite Spellbinders Floating Balloons 3D embossing folder. It's a match made in heaven.

Mama Elephant It's Poppin

To start, I actually stamped all of the images in It's Poppin and colored them all with my copic markers. I used the coordinating dies to cut them out and stashed the other two for later on.

Mama Elephant It's Poppin

I took a piece of white cardstock and embossed it with the Spellbinders Floating Balloons 3D embossing folder, then placed the panel in my splatter box and went to town with distress oxide sprays. I let the panel dry, splattered it with water, let that dry and then thought it better to run the panel through the embossing folder again. It did make a difference in the balloons standing out.

***So, suggestion to spray your panel with color first, let it dry completely and then emboss it.***


With that done, I splattered the panel with white paint and then trimmed it down to 4x5.5 inches and popped it up on a white card base. I added a couple strips of washi tape to the bottom edge. Then I cut the Mama Elephant Big Happy Birthday three times and glued the layers together before gluing them to the card front. Last, I added the image with foam squares.

For finishing touches I added black glaze pen to the kitties' eyes and noses and stardust Stickles to the stars in the balloon.
 
I appreciate you sharing your time with me. Have a fabulous day!

Links to products used or recommended are listed below: 
Thursday, April 25, 2024

Quick and Easy Stenciled Card Design [Take Two]

Last week I shared some tips for creating multiple quick and easy cards. Today I'm sharing the second card from that post. If you missed it, be sure to head over for a look.  I explain my process for quickly producing a bundle of cards.

Here's the second card.

Pinkfresh Studion Beautiful Blooms

Here are all three colors.

For this card I used the larger frame from Mama Elephant's Flirty Scallop Frame die set and I changed up the stencil for the background.  This time I used the Deco Leaves stencil.

Pinkfresh Studion Beautiful Blooms

Pinkfresh Studion Beautiful Blooms

Below are the cards I shared in last week's post.  Be sure to head over for all the details.

Pinkfresh Studion Beautiful Blooms

Thanks so much for stopping by!  I hope you were inspired.

-Cathy

 Links to products used or recommended are listed below: 

Tuesday, April 23, 2024

Aren't you Juice the Cutest!

 I've decided to design another card duo based on one background panel.  Here's the first card:


Mama Elephant Boxed Drinks

I had that distress oxide panel on my desk.  I decided to use it for 2 different card designs.  You'll see the 2nd version next week.  I used the same supplies for both cards:

  • Mama Elephant - Boxed Drinks | stamps + creative cuts
  • Pretty Pink Posh - Sentiment Strips: Birthday | stamps

Mama Elephant Boxed Drinks

I went back to my love of a soft pastel palette.  Those sweet Mama Elephant images are perfect for it.  I'm very slowly growing my birthday stash.

The distress oxide blend is:

  • Scattered Straw
  • Dried Marigold
  • Abandoned Coral

Mama Elephant Boxed Drinks

Don't forget to come back next week for my other card!


 Links to products used or recommended are listed below: 

Monday, April 22, 2024

Reverse Embossed Backgrounds

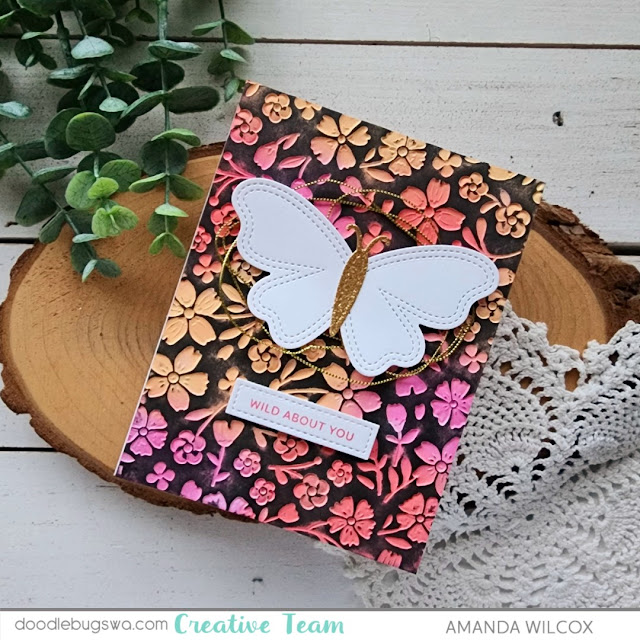
Hey friends! This is Amanda from Twiddler's Nook. Today I'm playing with reverse embossed backgrounds today and LOVING the outcome! It's simple to do but looks complex which makes it all that much cooler!

Spellbinders Flower Frenzy Embossing Folder

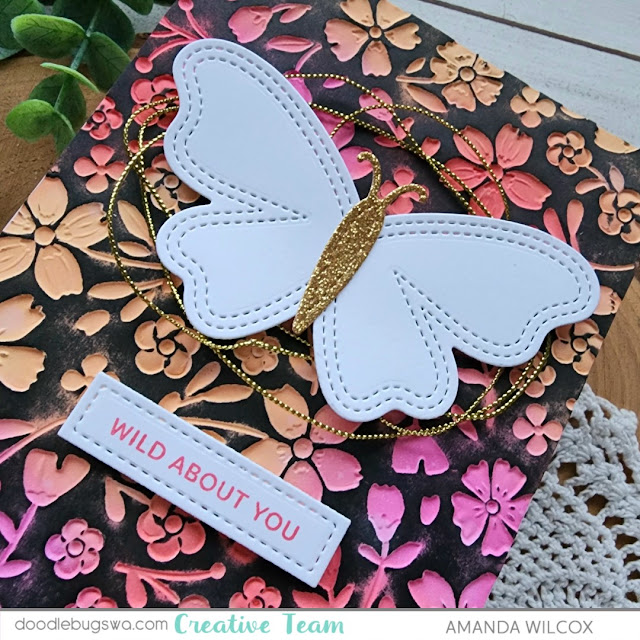
I started with a piece of white cardstock and ink blende it randomly with distress oxide inks. Today I chose picked raspberry, abandoned coral and wild honey for my colors. There was very little blending involved, mostly just getting color coverage on the panel. Then I put the panel in my Spellbinders Flower Frenzy embossing folder with the color side touching the protruding flowers. This way the flowers are inset into the panel instead of popping up.

Pretty Pink Posh Stitched Butterflies

After running that through my die cut machine, I inked up my brayer roller with black ink and carefully rolled ink over the panel. As long as you don't push your embossing flat with the roller, the ink will stick to the top of the panel and not go in the flower indents.

Pretty Pink Posh Stitched Butterflies

I glued the panel to a white card base and pulled out the Pretty Pink Posh Stitched Butterflies dies. I chose a simple one to cut from white cardstock with a gold glitter body. I used liquid glue to adhere the pieces, wrapped some gold thread behind the butterfly and popped it up with foam squares on my card front. Last, I chose a sentiment from the Pretty Pink Posh Sentiment Strips | Valentine stamps to ink up with Lawn Fawn guava ink on a sentiment strip, also from Pretty Pink Posh.

Isn't this technique so cool?!? I can't wait to try it with different color combos. Maybe even leaving the embossing white and rolling a color over the top. So many possibilities!

I appreciate you sharing your time with me. Have a fabulous day!
 
  Links to products used or recommended are listed below: 

Thursday, April 18, 2024

Quick and Easy Stenciled Floral Cards

Today I'm sharing my process for making a BUNCH of floral cards quickly.

Beautiful Blooms from Pinkfresh Studios
To start, I grabbed the Beautiful Blooms stamp set from Pinkfresh Studio.  This set has three floral images on one stamp set. I used the bottom [lower set] to stamp several sets of images.  This is a huge time saver as each stamp creates three images instead of one.  The coordinating die works the same.  It's one die that will cut all three images in one pass through my die cut machine.  Another big time saver.

To color the images I used the coordinating stencil.  The stencil is designed to line up with all three images. So again, you save time inking / coloring all three images on each layer.  Make sure you don't die cut the images until after you color them.  I used the same colors for each set [this was quicker] and changed the color when I moved on to the next set of stamped images.  When I was finished I had four images of each flower, all in a different color.  Below are three of the colors.

Pinkfresh Studio Beautiful Blooms

I stenciled a background for each card matching the color of the floral images.  The frame is cut from the Flirty Scallop Frame from mama Elephant.  When I cut the die, I cut both the small and the larger frame.  This saved time and I used the larger frames with the bell shaped flowers.  I'll share that card next week.

Pinkfresh Studio Beautiful Blooms

Pinkfresh Studio Beautiful Blooms

Thanks so much for stopping by the blog.  I hope you'll stop by next week to see the additional cards I created.

-Cathy

 Links to products used or recommended are listed below: 

Tuesday, April 16, 2024

Friend

I've been really enjoying stenciling lately.  I've been challenging myself to use different color combos and having fun.  Today is part two of two based one one A2 stenciled panel.  Here's how I was inspired today:


Do you remember my post from last week?  This is my other card that was inspired by the Strawberry Background.

These are the products that I'm featuring today:
  • Waffle Flower Crafts - Strawberries Background | stencil
  • Waffle Flower Crafts - Oversized Friend Print | die
  • Pretty Pink Posh - Sentiment Strips | Birthday


Here are the Concord & 9th inks I used:
  • Poppy
  • Sunflower
  • Avocado
  • Peacock
  • Oceanside
The friend has been cut from the Altenew Glitter Cardstock Set | Gilded.  I used gold embossing paste from my stash for the strawberry seeds.

I changed up my design from last week but keep the overall elements the same.


Here is the card duo side by side:


Thanks for stopping by!
 
 Links to products used or recommended are listed below:  
 

Monday, April 15, 2024

Cover Plates with Embossing Texture

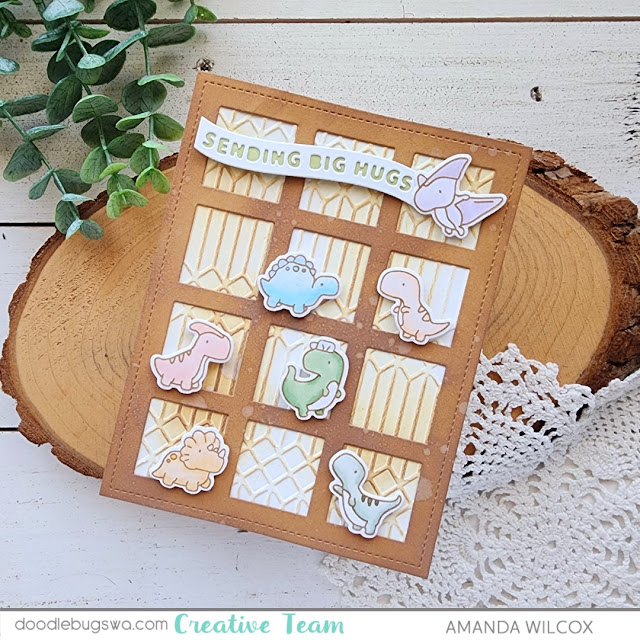
Welcome to a fresh new week everyone! This is Amanda from Twiddler's Nook finding new looks for all the fun window cover plates out there. I love using them for added interest and ways to ground images but sometimes that plain background in the windows is boring. Today I played with an idea that you could definitely grow on to add texture and interest to those spaces.

Mama Elephant Little Dino Agenda

I cut the Mama Elephant Window Grid from kraft cardstock and slid a white panel behind it. Then I pulled out my Little Dinosaur Agenda stamps out and chose a few to fill in the windows. After stamping and coloring the ones I picked, I used the coordinating dies to cut them out.

Mama Elephant Little Dino Agenda


When it was time to start layering everything together I didn't want just ink blending or splatter in the windows so I took the Spellbinders Columns embossing folder and ran the white panel through my die cut machine. That was cool but now I wanted a little more so I did random ink blending with distress oxide gathered twigs ink on the window panel and the embossed panel. Then I splattered it all with water. This was much more my style.

Mama Elephant Little Dino Agenda

I used liquid glue to adhere those panels to a white card base and then popped all my dinosaurs up with foam squares. For my sentiment I cut one of the Mama Elephant Banner Greetings, glued the layers together and popped it in place with a foam strip like the pterodactyl is holding it while flying. This seriously made me giggle.

Remember you could keep the windows that cut out of the cover plate and emboss those pieces too! Another way to test the idea out and not use another piece of cardstock. Anyone interested in seeing that idea? Leave me a comment and let me know.

I appreciate you sharing your time with me. Have a fabulous day! 
 
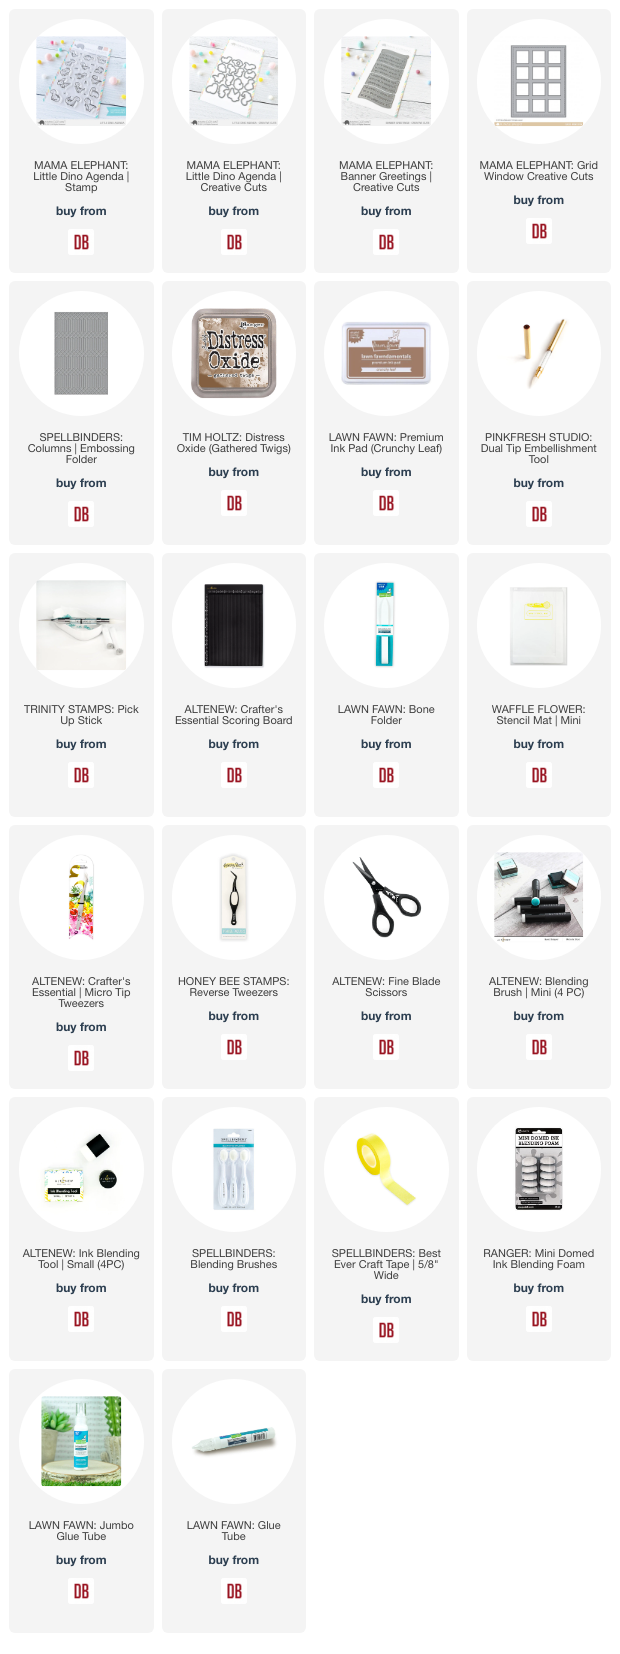
Links to products used or recommended are listed below: 

Thursday, April 11, 2024

Sweet Floral and Birdie dies from Spellbinders

Today I'm sharing some floral cards with one of my favorite bird dies from Spellbinders.  The Little Chickadee [and Sweet Birdie die] are the perfect size for so many cards and they are budget friendly too!  They are both definitely favorites of mine.

Spellbinders Little Chickadee and Freshly Picked Anemone

I paired the cute little bird with some flowers I die cut from the Freshly Picked Anemone die from Spellbinders.  I added this to my die collection a while back and haven't had a chance to use it.

Spellbinders Little Chickadee and Freshly Picked Anemone

For a sentiment I used the sweet, little banners from Mama Elephant's Banner Greetings die.  It's another favorite of mine and I find myself reaching for it often.

Spellbinders Little Chickadee and Freshly Picked Anemone

I love how quickly these cards came together.

Thanks so much for stopping by.  I hope I've inspired you to create something today.

-Cathy

 Links to products used or recommended are listed below: 


Tuesday, April 9, 2024

Celebrate!

I've been really enjoying stenciling lately.  I've been challenging myself to use different color combos and having fun.  Today is part one of two based one one A2 stenciled panel.  Here's how I was inspired today:


These are the products that I'm featuring today:
  • Waffle Flower Crafts - Strawberries Background | stencil
  • Waffle Flower Crafts - Oversized Friend Print | die
  • Pretty Pink Posh - Large Celebrate Shadow | die
  • Pretty Pink Posh - Sentiment Strips | Birthday


Here are the Concord & 9th inks I used:
  • Poppy
  • Sunflower
  • Avocado
  • Peacock
  • Oceanside


The celebrate has been cut from the Altenew Glitter Cardstock Set | Gilded.  I used gold paste from my stash for the strawberry seeds.

Next week I'll be sharing another project that uses the other half of the stenciled panel in my card design!

Thanks for stopping by!

 Links to products used or recommended are listed below: 

Monday, April 8, 2024

Texturizing Your Backgrounds with Embossing Folders and Inking

Hey friends! It's Amanda from Twiddler's Nook. For this installment of Mix it up Monday I came up with an idea for adding color and texture to your backgrounds in a different way. We're going to ink, emboss and then ink again for added awesomeness!

Mama Elephant Little Agenda Farm

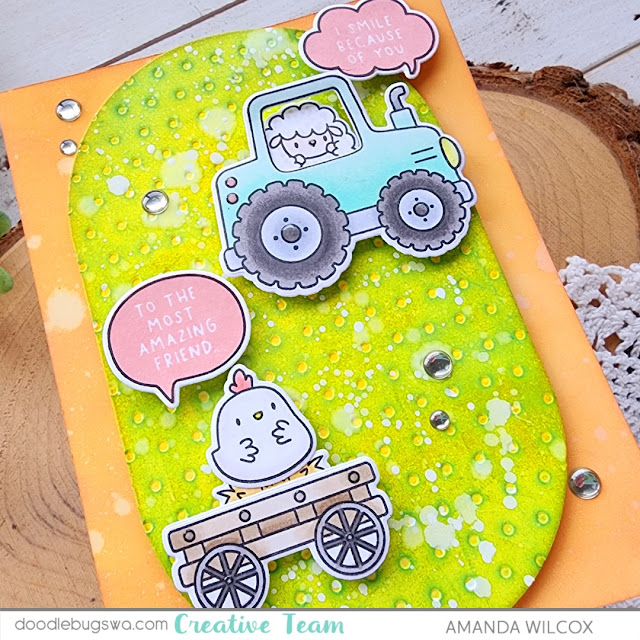
I had an idea for embossing folders and wanted to try it so that's where today's project started. I took a piece of white cardstock and die cut it with the largest Spellbinders Modern Oval die. I inked the panel up with yellow ink and inserted it into the Spellbinders Tiny Dot embossing folder and ran it through my die cutter. After I removed it, I flipped it over to what we normally consider the back side. So the dots indent instead of stick up. Then I added a layer of teal ink over the top with a brayer roller. This kept the ink out of the dots and just added a layer over the panel. Then I added a layer of peacock feathers distress oxide ink over that for a darker effect. I spritzed the panel with water and then flicked white paint on it too.

Mama Elephant Little Agenda Farm

While that was drying I pulled out some Mama Elephant sets to stamp, color and die cut. I started with Little Agenda Farm and then moved on to Simple Friends Bubbles for my sentiments. Last I used liquid glue to assemble my critters in place and added foam squares to the back of everything.

Mama Elephant Little Agenda Farm

I didn't want the card base to be stark white so I inked it up with distress oxide ink in ripe persimmon and spiced marmalade and spritzed it with water. Then I adhered the oval with foam tape and finally added the images and speech bubbles.

For finishing touches I added glossy accents to the critter nose/beaks and bits of the tractor and wagon too. Last I added some enamel dots across the design for a bit of shine and reflection in the light.
 
I appreciate you sharing your time with me. Have a fabulous day!

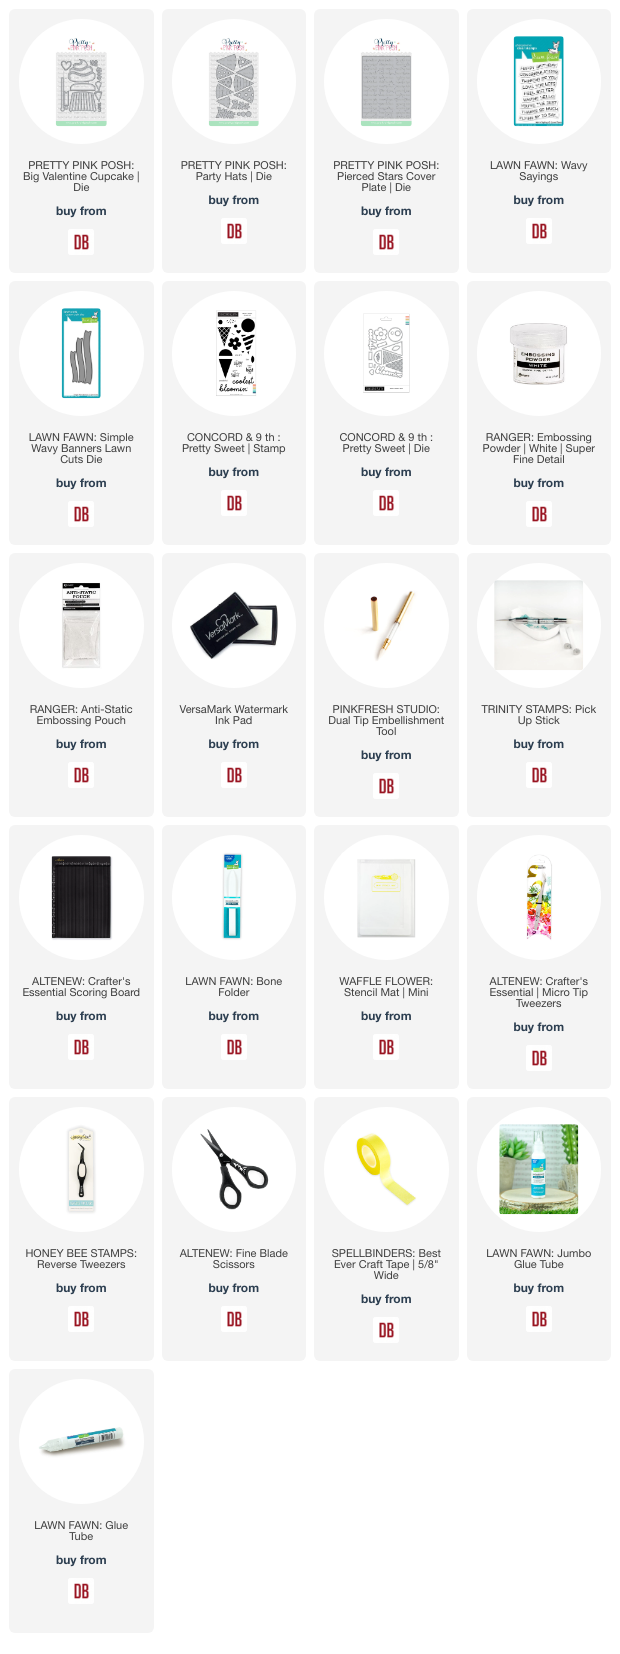
 Links to products used or recommended are listed below: 

Tuesday, April 2, 2024

You are the Coolest

 I'm back to designing birthday cards. Here is how I was inspired today:


I love it when a card comes together from scraps.  I had started a different card but never finished it.  I decided to challenge myself by adding Lawn Fawn and Concord & 9th elements to my design. Here are the products I'm featuring:

  • Pretty Pink Posh - Big Valentine Cupcake | dies
  • Pretty Pink Posh - Party Hats | dies
  • Pretty Pink Posh - Pierced Stars Plate | die
  • Lawn Fawn - Wavy Sayings | stamp
  • Lawn Fawn - Simple Wavy Banners | lawn cuts
  • Concord & 9th - Pretty Sweet | stamp + dies

The Happy Birthday + coolest sentiments have been heat embossed in white.  The 'you are the' sentiment has been stamped in Concord & 9th - Nutmeg.


I absolutely adore all the details on the dies!

Have an amazing day!
 
 Links to products used or recommended are listed below: