Wednesday, May 31, 2023

Hey You Page Huggers

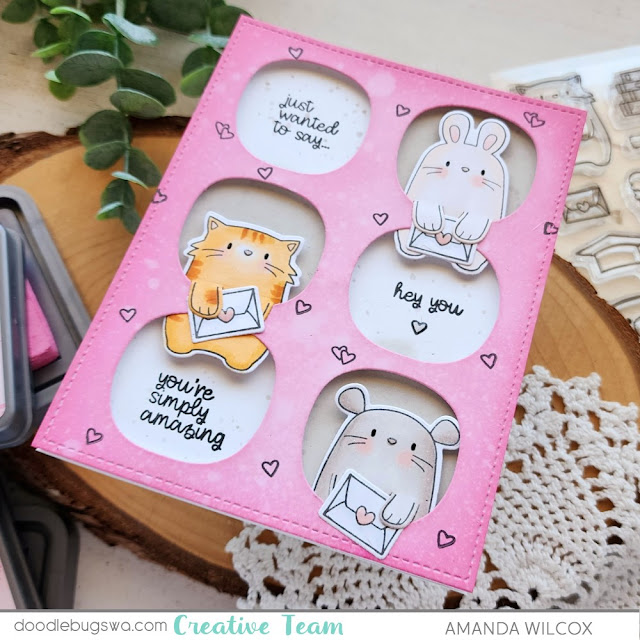
 Happy Hump Day everyone! This is Amanda from Twiddler's Nook. I'm thrilled to be on the Doodlebugs blog again today with another sweet card using Mama Elephant stamps and dies. These Page Huggers released quite a while ago but are so adorable and very fun to create with!

Mama Elephant Page Hugger dies and Six Window Cover Plate

Today I chose three out of the four critters in the set to stamp and color with my copic markers. At first I was going to have them each hold something different in their hands but that envelope is just so sweet, I went with happy mail from each of them instead. After coloring everything, I used the coordinating dies to cut them out.

Mama Elephant Page Hugger dies and Six Window Cover Plate

Full transparency, I die cut the Six Window cover plate from white cardstock and then used distress oxide ink to add color. Highly recommend learning from me and inking your paper before die cutting. Lol! It's doable but it was a pain trying not to bend and fold the skinny parts between the windows.

I went with picked raspberry on the outer edge and kitsch flamingo for the center. Then I spritzed it with water and blotted it dry. 

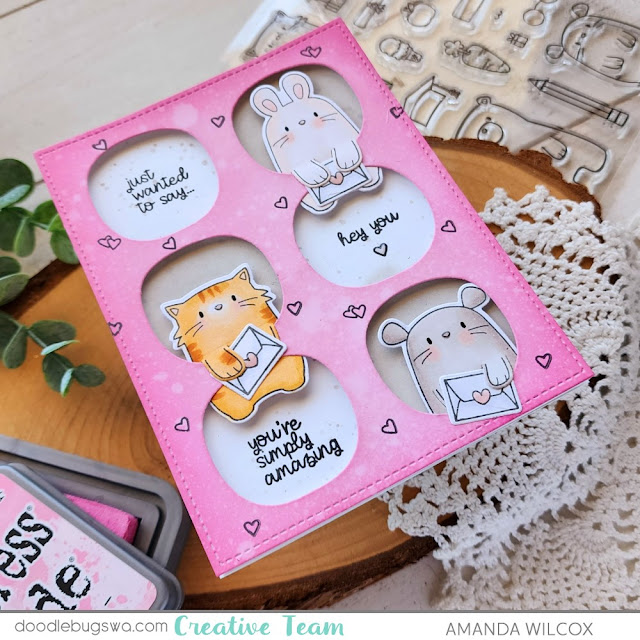
Mama Elephant Page Hugger dies and Six Window Cover Plate

Then, I took a white piece of cardstock and inked up lost shadow distress oxide behind the windows I wanted critters in. I mocked up my critters in the windows to see how things were looking and wanted more texture. So that's where I flicked lost shadow ink on the white panel before stamping sentiments in the open windows from  the To My Dearest stamp set.

Another funny for you and a way to salvage what might be lost. I had the tiny heart below "hey you" at the same time I was stamping the sentiments and I also had the grid window in place in my MISTI to make sure things lined up. Between inking the stamps and closing the lid, the heart fell and stamped on my pink panel. I almost lost it. But I took a breath and stared at it for a minute before thinking this could work. And now we have tiny hearts all over the cover panel.

Mama Elephant Page Hugger dies and Six Window Cover Plate

Now we're finally ready for assembly. Glue the sentiment panel to a card base and add your critters to the open windows with liquid glue where you can. Then flip the window panel over and line it with foam strips and squares. Pop that in place on the card front and you're ready for finishing touches.

This is one of my favorite parts of creating a card. Things really come to life here. I added black glaze pen to all of their eyes and glossy accents to the critter noses and the hearts on the envelopes. Then at the very end I also added it to the heart under "hey you." It was the problem child after all so I thought it needed some extra attention.

I hope you enjoyed this creation and find some humor and comradery in my flubs. We all make them. You're not alone. Message me if you're ever having a moment. I'm happy to chat!

I appreciate you sharing your time with me. Have a fabulous day!

Remember that if you use my link to make your first purchase with Doodlebugs, you get 15% off. Plus she's got crazy awesome free shipping thresholds, rewards program and AMAZING customer service! Click HERE to shop your heart out!
 
Links to products used or recommended are listed below:   

Friday, May 26, 2023

Another feathered friend!

Hello my friends!  Michele here, and I am so excited to introduce you to my latest feathered friend!  

This fabulous die from Honey Bee Stamps could easily be painted to be many different birds!  But for today, since we're watching Mama and Papa tending this season's nest, it had to be painted as an Eastern Bluebird!  

Meet Papa bird - who is so sweet to bring food to Mama and yes sits high atop the Maple in our back yard to watch for Tom to serve dinner!  I only wish I could twitch my nose and turn that Maple tree in a flowering Cherry!

Honey Bee Stamps Lovely Layers Spring Birds and Cherry Blossoms

My color was added with finger daubers today:  Blueprint Sketch for my Bluebird!

Isn't this Layered Cherry Blossom beautiful?  Behind it you'll spy the Pinkfresh Studio: Simply Diamonds [that I borrowed so many times from my friend - I had to make it my own!]
Behind THAT a panel of Honey Bee Stamps Grain & Grunge designer paper.

Honey Bee Stamps Lovely Layers Spring Birds and Cherry Blossoms

Last but not least another perfect sentiment from my much loved
My Favorite Flower - also from Honey Bee!   Today, I used one of the smallest of
Spellbinders' Essential Stylish Ovals to cut it - I can see this becoming a favorite die set -
SO many essential sizes!


I hope you like my Bluebird and Blossoms - and that you have a wonderful weekend!  Thanks for stopping by today!  We appreciate you!

=] Michele

Wednesday, May 24, 2023

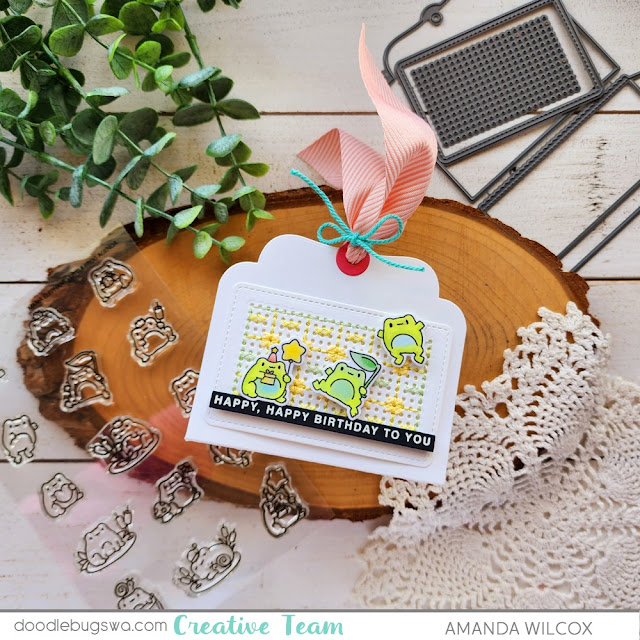
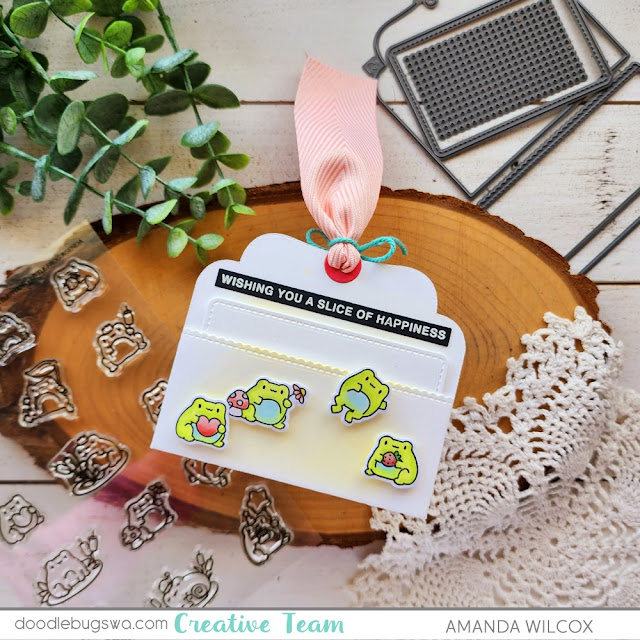
Mama Elephant Froggy Gift Pocket Tag with Stitching

Hello everyone! It's Amanda from Twiddler's Nook and I'm excited to share but sad at the same time that this is my last week guest designing for Doodlebugs. It's been really fun creating with Mama Elephant goodies to share with you and I always love shopping at Doodlebugs, so I'd say that's a win!

Today I'm sharing a fun gift card holder featuring the Little Agenda Froggy, Gift Pocket Tag dies and Easy Sentiments. I love that the gift pocket tag has a panel you can optionally add stitching holes to if that's your thing. I love stitching on these small areas for a bit of relaxation in front of the TV.


Mama Elephant Little Frog Agenda


The first thing I did was die cut the card and stitching holes, then chose some embroidery floss and started playing. After having to undo what I stitched because the math wasn't right, I drew out a grid and started playing to make sure my pattern would work. Once that was decided, I stitched the panel up and glued it to my gift card holder tag.

Mama Elephant Little Frog Agenda

Then I stamped and colored a few frogs from the Little Agenda Froggy stamp set and used the coordinating dies to cut them out. Next, I stamped and heat embossed a set of sentiments from Easy Sentiments and used the coordinating die to cut them out. This set is fun because you stamp and cut three sentiments at once. 

I added everything with foam squares and flipped my project over to decorate the other side next!

Mama Elephant Little Frog Agenda

On this side, I inked the white panel with yellow ink and a blending brush before popping more cute froggies up with foam squares. Then I glued another sentiment down with liquid glue. I did this so the card won't get caught going in and out of the slot.

Mama Elephant Little Frog Agenda

Next, I cut a hole reinforcer for both sides and glued them in place. I threaded ribbon through the hole and tied it with twine.

For finishing touches, I added black glaze pen to all the frog's eyes and glossy accents to parts of the images like the heart, flower center, strawberry and balloon. 

In case you like the idea of stitching on this panel but aren't sure where to start, I created an idea sheet with six different patterns that are sized perfectly for this Gift Pocket Tag die set. Click HERE to download it.

I hope you enjoyed these projects and found some inspiration to create something wonderful to share with someone! I appreciate you sharing your time with me. Have a fabulous day! 
 
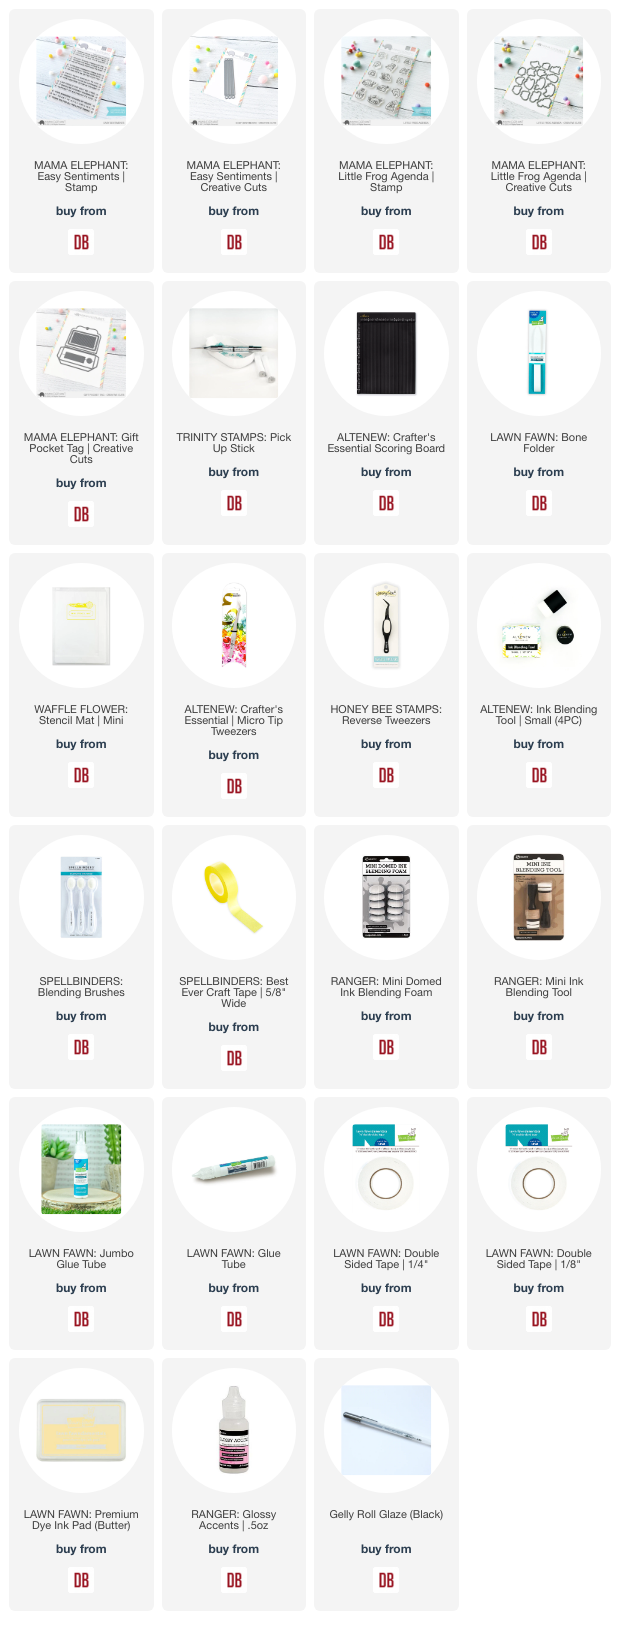
Links to products used or recommended are listed below:   

Monday, May 22, 2023

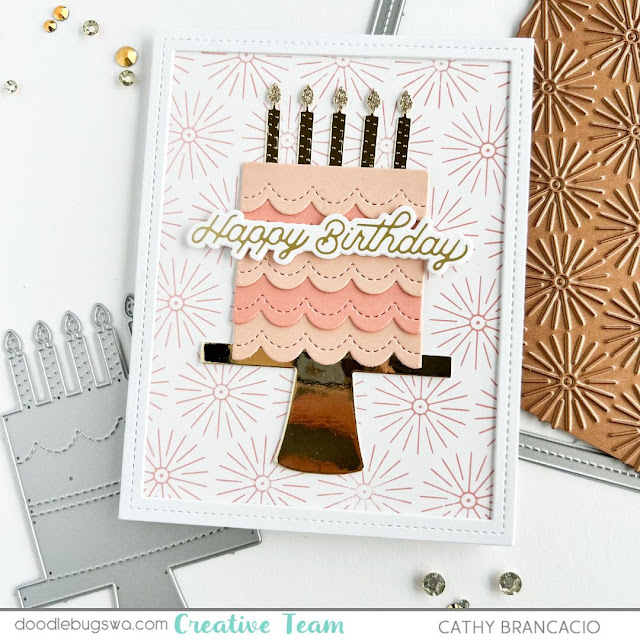
Make your birthday cards extra festive with the Starburst Hot Foil Plate background from Spellbinders

Today I'm sharing another version of the FREE project instruction sheet from last month.  It's listed on our website under the PRINTABLES tab.  I'm trying to add one new download each month.  So check back often for a new project.

The Fancy Cake die from Pretty Pink Posh is easy to die cut and assemble. However, if you're looking for more details, download the project sheet.

Pretty Pink Posh Fancy Cake and Spellbinders Starburst Hot Foil

The background for this card is hot foiled using the Starburst hot foil plate from Spellbinders.  I used the peach color foil from the Satin Pastels Hot Foil set, also from Spellbinders.  The peach color worked nicely with the coral / peach cardstock. 


 Not loving the peach / pink color?  Here's another version of the same card.  I assembled the cake differently and left off the outside frame for this version.

Pretty Pink Posh Fancy Cake and Spellbinders Starburst Hot Foil
The sentiments for both cards were hot foiled using the Birthday Unboxing hot foil set from Spellbinders.  It has some great sentiments and is one of my "go to" sets for birthday cards.

Hope you have a great week and find some time to get creative!

Cathy
  

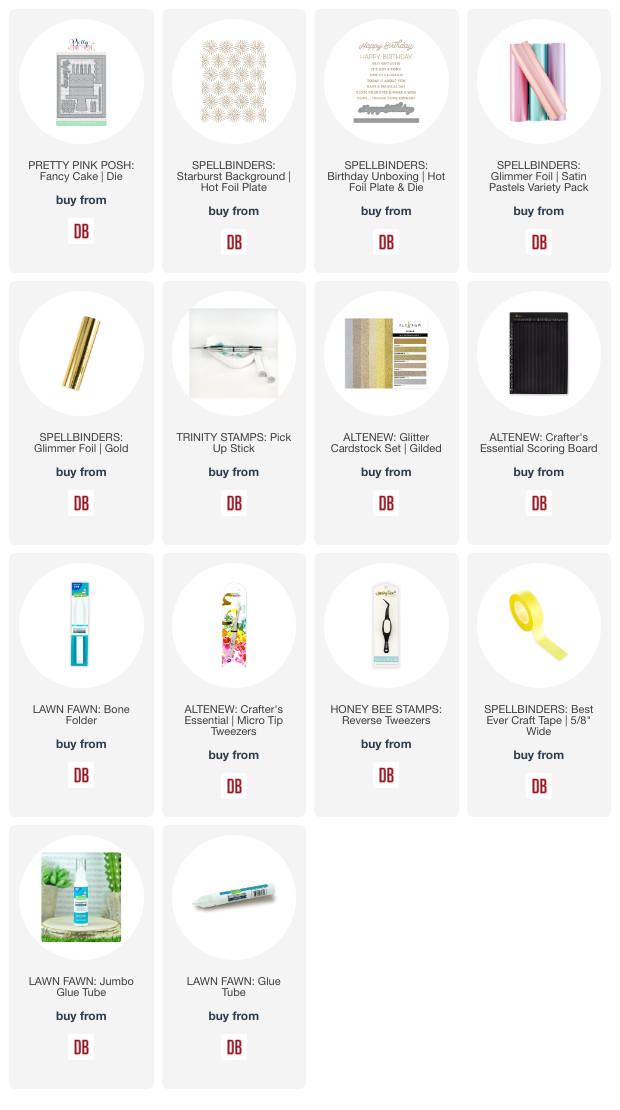
Links to products used or recommended are listed below:  

Friday, May 19, 2023

More than words!

Thanks for stopping by today - hello!  Michele here today and by now you might have figured out that words are pretty important to me, right?  HA!  Just try to shut me up!  

Today, I found a way to use some of my favorite words - some die-cut, some hot foiled - all found in the Doodlebugs shop!   OH and I found a home for a few more Pinkfresh Small butterflies - wink.

A good rule of design is to first create a focal point - first up: Pinkfresh Ornate Circle die: when cut, it also cuts a perfect circle from the center!  I decided to add a little 'greenery' for my butterflies there... this embossing folder is one of 100+ in my stash - I'm sure you have just the ticket, too!  I love this hot pink and orange combination...

Pinkfresh Studios Ornate Frame

and I love that this Concord & 9th Just Saying set comes with two-layer sentiment dies.

[pssst there are even more new word sets from C&9th in the shop now!]

These mini butterflies are made using my leftover foil from hot-foiling, then die cut.  It was so quick and easy to 'color' them using ink and my finger daubers!

Pinkfresh Studio Ornate Circle

Next, I used the same embossing folder as before with vellum to give an 
ethereal feel to my card base...


This fabulous BIG beautiful Thank You is from Pinkfresh Studio - the words are hot-foiled on white, then ink blended, then die cut with the shadow dies!  


Thanks so much for stopping by today - hope you found something to make you smile!
=] Michele
 
I love using my old un-labeled embossing folders - if you need a few more, 
there are tons available HERE!
 

Links to products used or recommended are listed below:  
 

Wednesday, May 17, 2023

Mama Elephant Sending Lots of Love

 Hello everyone! It's Amanda from Twiddler's Nook again today with some more fun Mama Elephant inspiration. I adore the striped heart in the Mod Heart die set and have wanted to pair it with one of the To My Dearest critters for a while. Well, I finally just got everything out and played! It turned out so sweet too!

Mama Elephant To My Dearest stamp and die

I used the dies and stamps to be sure everything was going to fit the way I wanted it to. Then I started ink blending, stamping and coloring. First, I did a little trick to get my ink blending to show up on the heart with the whole rainbow. Super simple but does take a moment of thinking ahead.


I simply took a white cardstock panel, flipped the die over on it and traced the outline. We know the pencil won't show because it's outside the cutting area of the die and this way I can plan my rainbow blending a little easier.

Once the blending was done, I ran the panel through my die cutter with the die, flipped it over to keep the pieces in the die and used washi tape to adhere them together before removing them from the die. You can't see the washi at all because I used a mostly white/transparent one so I could also just add my foam tape strips at the same time.

Mama Elephant To My Dearest and Mod Heart

Next, I chose the cute Hammy from To My Dearest to stamp and color. After I colored, I stamped a sentiment on the paper and then used the coordinating die to cut him out. I also stamped some small hearts and used the dies to cut them out too.

Mama Elephant To My Dearest and Mod Heart

Finally, I cut the ragged edge rectangle from Mod Heart out of kraft cardstock. Then I inked it up with Distress Oxide ink in Gathered Twigs and Ground Espresso for a worn paper look. I spritzed the panel with water and blotted it dry before adding foam tape to the back and popping it up on a white card base.

Next, I added the rainbow heart and finally Hammy and the tiny hearts floating away. For finishing touches I added black glaze pen to his eyes and glossy accents to his nose. Then, I used stardust Stickles for all of the small hearts.

Simple card but so sweet and sure to make someone's day.

I appreciate you sharing your time with me. Have a fabulous day! 
 

Links to products used or recommended are listed below:   

Copic Markers

Monday, May 15, 2023

Quick and easy spring flower card using the Friendly Florals dies from Concord & 9th

Short on time?  I have a quick and easy card today.  

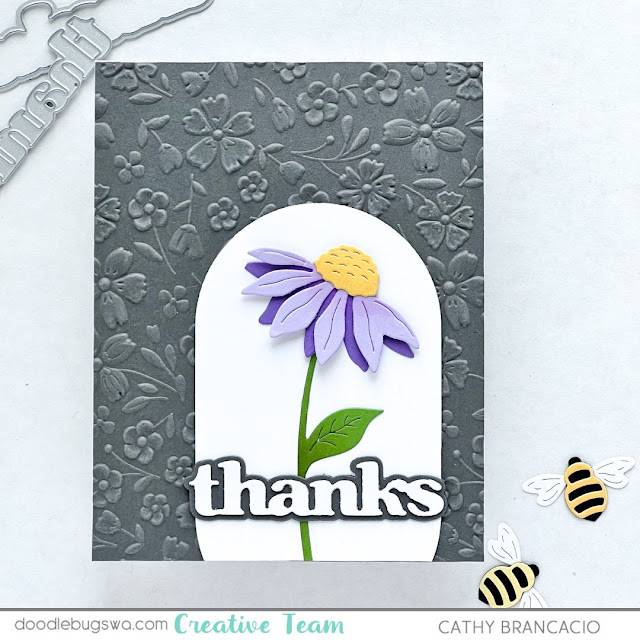
Once again, I'm using the Friendly Florals die set from Concord and 9th.  It's such a fun die and I LOVE those little bees!  I had several assembled flowers left over from a previous card.  So, that step was already finished.  That sentiment is from the Versatile Greetings die set from Altenew and was also already assembled.  I have a bin full of assembled sentiments from this set.  When I don't have much time to create, it helps to have some of these steps already completed.

Concord & 9th Friendly Florals and Altenew Versatile Greetings

I embossed the background with the Flower Frenzy embossing folder from Spellbinders.  After embossing, I added just a tiny amount of white ink across the raised areas.  The easiest way to do this is with a large, flat blending brush.  You can also use the ink pad direct to paper if you're careful.  You just want to lightly rub across the raised areas.

Concord & 9th Friendly Florals and Altenew Versatile Greetings
I added the die cut oval, flower, and sentiment, to the top of the embossed panel for one of the quickest cards I've made in a long time.

Hope you're inspired to get crafty!

Cathy


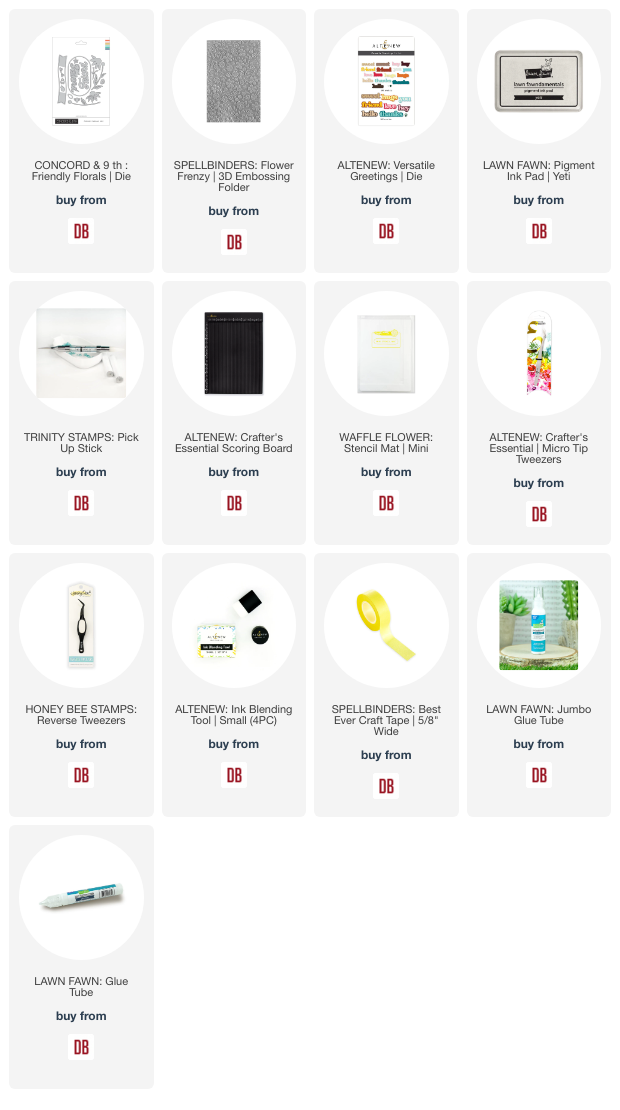
Links to products used or recommended are listed below:  

Friday, May 12, 2023

Anniversary Tulips!

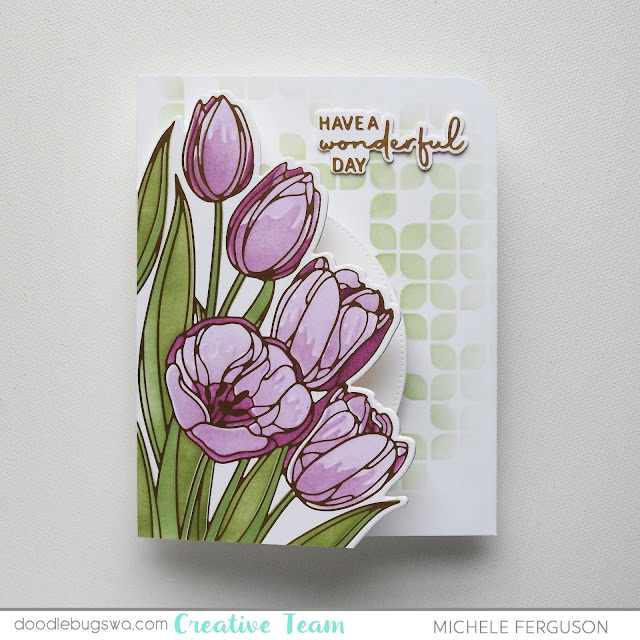
Hello friends!  My darling husband and I are right now as you are reading this [she hopes] on a ferry boat to Mackinac Island to celebrate our 28th wedding anniversary!  We were both born and raised right here in Michigan - but NEITHER of us has ever visited our [no cars allowed] Island!  

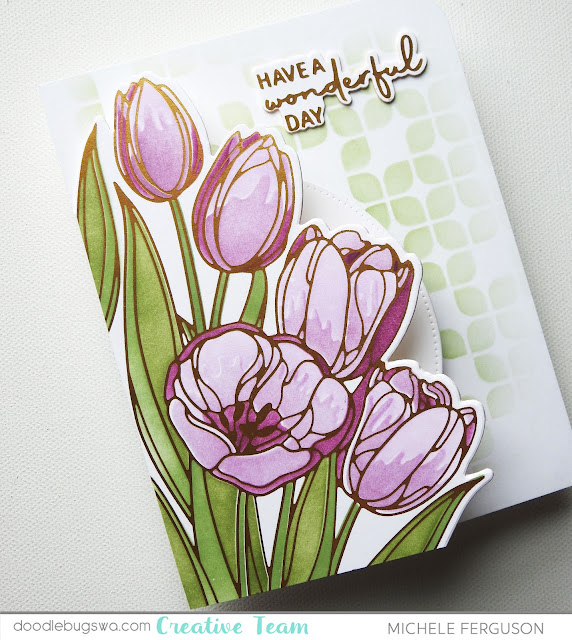
To celebrate our special day, I created this card in honor of the tulips [though they were white] I carried down the aisle!

Welcome, Spellbinders Wonderful Tulips to my ever-growing collection of tulips!!  

Spellbinders Wonderful Tulips Hot Foil Plate and Stencils

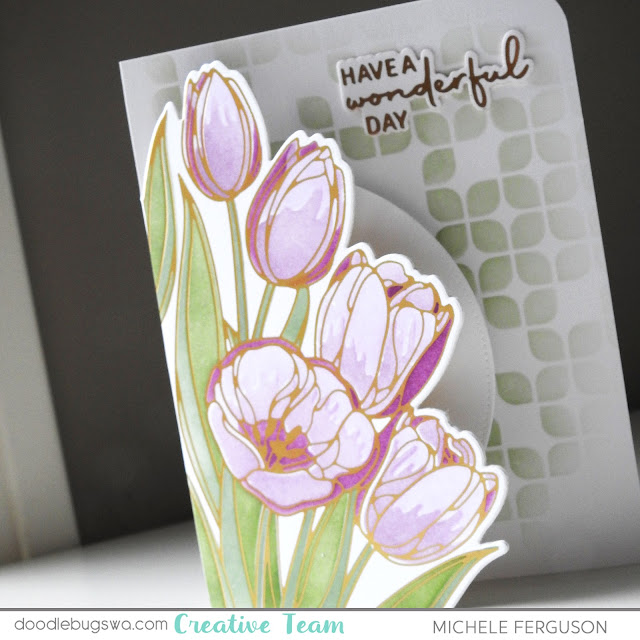
Here is how this peek-a-boo card came together:

I first foiled a half-sheet of Hammermill white card with the Tulip plate, and sentiment, using a satin foil.  Then I added color, using the coordinating Layering Stencils and three shades of ink for the tulips, and two shades of green for the stems/leaves.

Spellbinders Wonderful Tulips Hot Foil Plate and Stencils

The set comes with a die to cut the floral outline on the right side, leaving the straight edge of 
cardstock as is.  I then created a side-fold A2 card [4.25 x 5.5 inches] and used the same die
to partially cut the front of my card.  The stenciled tulips were then simple aligned and glued
to the front panel.  I used an unlabeled stencil from my stash to add a little interest to the part of my card that will show, and strategically place a circle of plain white into the fold for my inside sentiment.

Spellbinders Wonderful Tulips Hot Foil Plate and Stencils

Isn't she lovely?? I LOVE the detail the layering stencils give to my tulips!

=] Michele

Links to products used or recommended are listed below:  
The stencil Michele used is not currently available.  Below are a few suggested substitutes.

Wednesday, May 10, 2023

Mama Elephant Planner Clips


Welcome friends! It's Amanda from Twiddler's Nook for another Doodlebugs guest design post. This time I'm not sharing a card but a fun way to decorate your desk or planner with super cute paperclips! They are really easy to create, totally addicting and would make a fun gift along with something to use yourself.


Mama Elephant Little Bus Agenda

Here's a look at the set I created this time. So many sizes for different uses. The large one could hold your planner more flat while writing in it while the others are great for keeping your place in your planner, book or use it as a regular paperclip on your desk.


To create these I started by stamping the images I wanted to use and colored them with copic markers. Using the coordinating dies I cut the images out, plus 3 additional blank ones too. I glued the colored image to one blank, then glued the other 2 blanks together. You should have 2 sets of each image now.


Next, I add double-sided tear tape to the back of the colored ones and the front of the blank stack. remove the release paper from the blank ones and position your paperclip where you want it. I put it as high as I can, where the points of the metal ends rest along the bottom of the image. Next, I add strong liquid glue all the way to the edges of this, remove the release paper on the back of the colored stack and adhere them together.

*Tip: I don't find that acrylic blocks put pressure in the right areas on these so I do take a moment to hold the layers together for a good hold. 

Mama Elephant Little Bus Agenda Planner Clips

This was my first large, double clip and I am loving using it to hold the page I'm writing on in my traveler's journal. It's the cutest, totally makes me smile and holds everything more flat than the others.

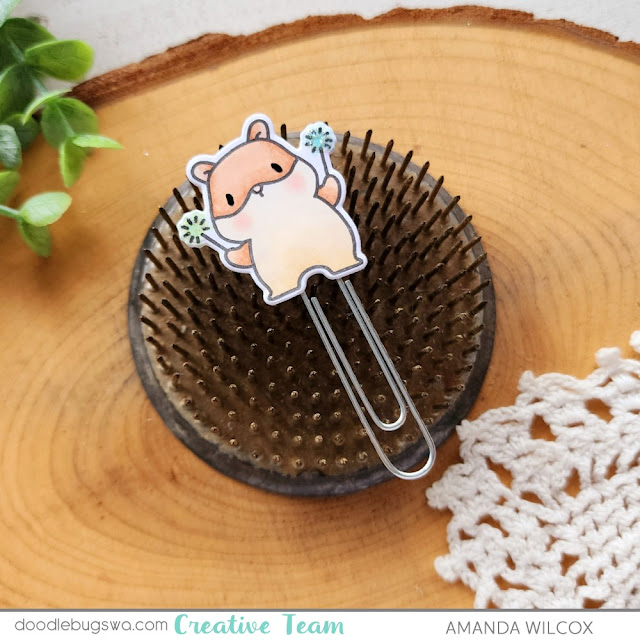
Mama Elephant Celebration Hamster Planner Clips

When I created this guy, I actually intended him for my desk at work for a little extra happy but he happens to hold my folder of mini photos closed in my traveler's journal closed perfectly, so that's where he lives for now. This size is also great to use as a bookmark.

Also, my boss was eyeing this guy, reminding me of when her birthday was so I think I better make a set of them.

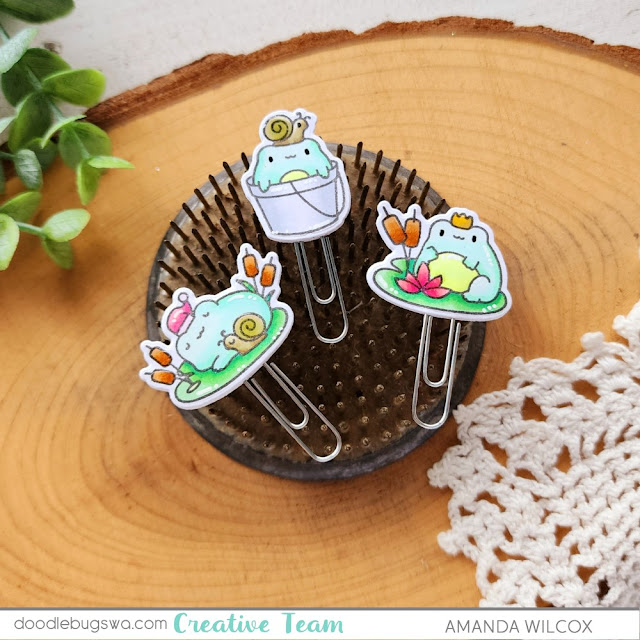
Mama Elephant Little Frog Agenda Planner Clips

Finally, I just had to make a few with the new Little Froggy Agenda cuties! They are my favorite! The happy colors and cute images are perfect!

Mama Elephant Planner Clips

Remember, you can add finishing touches to these for that little extra as well. I used black glaze pen on any eyes I could, white gel pen highlights on the frogs and glossy accents on things like snail shells, cattails and noses. Then I also added sparkle with stardust Stickles to the sparkles in Hammy's hands and the lights on the bus.

I have to know...will you give these a try? For yourself or a friend? 

I appreciate you sharing your time with me. Have a fabulous day! 

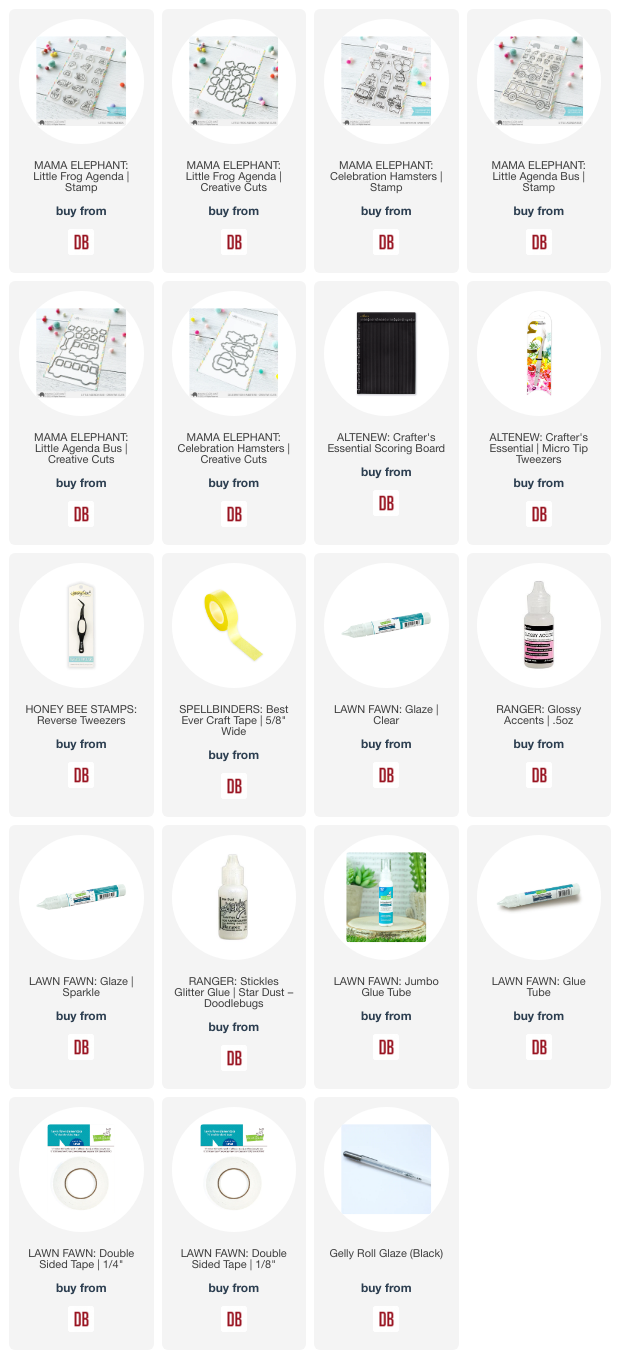
Links to products used or recommended are listed below:   

Monday, May 8, 2023

Watercolor ebmossed background with Spellbinders Flower Frenzy embossing folder

Last week I had my watercolors out, so I decided to create another card using them.  This time I added watercolor to an embossed background.  I love the way it turned out.

To create the background, I embossed some watercolor paper with the Flower Frenzy embossing folder from Spellbinders.  I then added quite a bit of water to the embossed area with my brush, and then touched color to the wet paper in different areas.  If the color didn't move enough, I added more water with my brush and gently pushed it in the direction I wanted.

After adding the color I set it aside to dry.

Spellbinders Flower Frenzy and Concord and 9th Friendly Florals
I assembled the flowers and bees using the Friendly Florals die set from Concord & 9th.  I did add just a small amount of color to the flower petals and centers with my Copic Markers.  Just to give them a little bit more of a painterly look.  I thought this would help them coordinate better with the painted background.

The sentiment is from the Versatile Greetings Hot Foil set and the coordinating die.  If you don't hot foil, the die set is a great option.  I love them both.

Spellbinders Flower Frenzy and Concord and 9th Friendly Florals

Once the paper was dry, I added some gold ink to the top of the embossed panel, touching just the raised areas.  It's easiest to do this with a large, flat, ink blending brush, but you can also use the pad directly to the paper.  Just be careful to lightly brush the top.  Heavy pressure will cause the ink to cover the entire paper.  You just want it to "kiss" the tops of the raised areas.

I also added the gold ink to the frame I cut.  I cut the frame from a soft golden yellow cardstock and then covered it with the gold ink.  I did use a heavy amount of ink for the frame as I wanted the gold to be the prominent color.

Spellbinders Flower Frenzy and Concord and 9th Friendly Florals
I tucked a tiny piece of foam tape under the petals to give them a slight lift.
 

Here's a close up of the gold ink on top of the raised embossed areas.  My photo skills don't show you how beautiful this technique really is.  It's much better in person.  I hope you'll give it a try.

Spellbinders Flower Frenzy and Concord and 9th Friendly Florals

I hope you enjoyed the project and that I inspired you to create something.

Have a great week.

Cathy


Links to products used or recommended are listed below:  

Friday, May 5, 2023

For the Birds! or bird OR beach lovers!

Hello again, my Doodlebugs friends!  Michele here with a card that's for the birds! or the birdlovers in each of us!  Okay, maybe the beachlovers in each of us?  WHO doesn't love that?

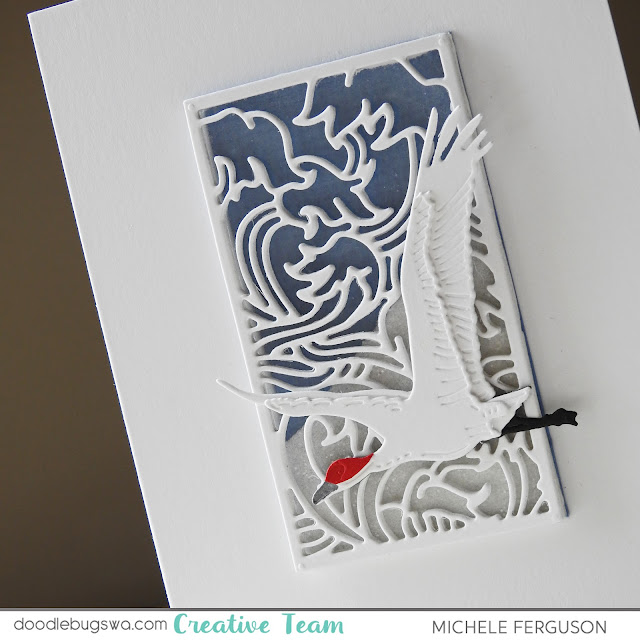
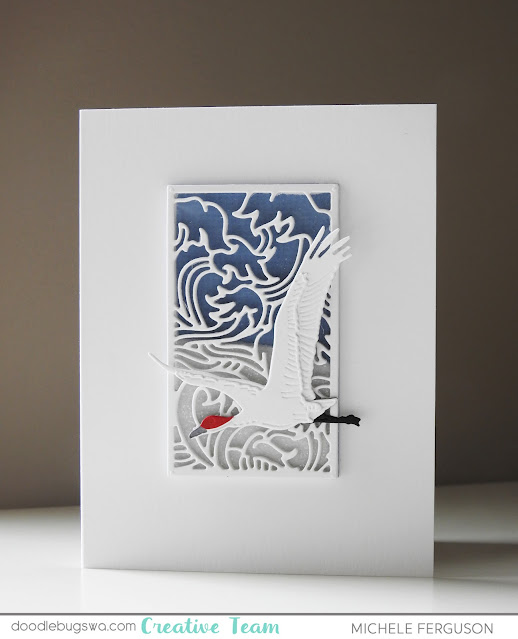
Red Crowned Crane and Wave Panel from Altenew

Sometimes it's best to start with the closeup, right?

My very CAS card starts by cutting this gorgeous Altenew Wave Panel Die three times 
from white cardstock.  I used 110# cardstock and a metal shim to get all those crisp cuts.
Stack and glue them up with a piece of acetate between the first and third layers.
Turn that over and add thinly cut strips of foam adhesive to those boarders.
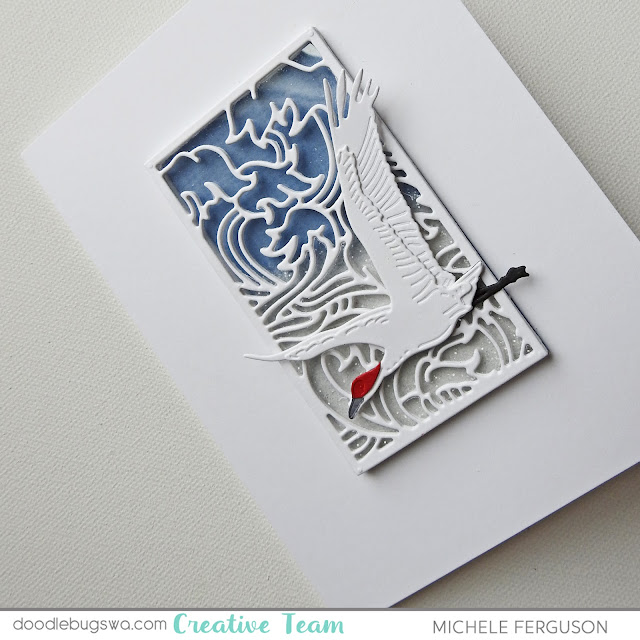
fill with glitter, and back with your choice of blue cardstock - instant wave!

Red Crowned Crane and Wave Panel from Altenew

For those of you who worry about that glitter:  before I adhered this little shaker to my card, I added a bead of clear adhesive on all four sides to 'lock it' inside - I hope it works!

Now about this bird - Altenew brought the Red-crowned Crane to life with all 
of these gorgeous layers!  I had such fun creating a purple crane that I shared on 
Instagram recently:
@mfergu01 if you'd like to see that one!

Red Crowned Crane and Wave Panel from Altenew

His 'red crown' was created by cutting this top layer from a snippet of red to cap off all of his white - there are TWO cranes included in this set!  I'm in love!  These guys are going to collect lots of frequent flyer miles in my studio!  Living on the east shore of Lake Michigan means there are lots of waves in my future, too!

Thanks for stopping by today!
=] Michele
 
Links to products used or recommended are listed below: