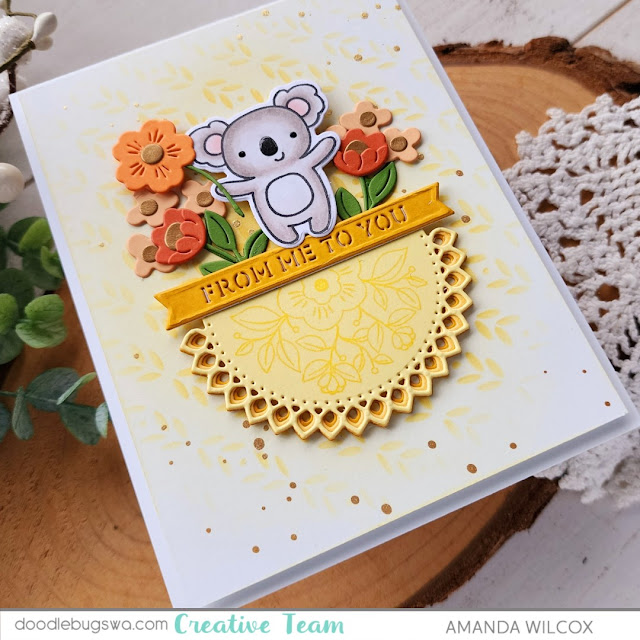
Welcome everyone. I'm so glad you're here. It's Amanda from Twiddler's Nook and it's Mix It Up Monday. Today we're playing with Spellbinders and Pretty Pink Posh today. I decided to NOT stitch on some glorious stitching dies to show you that you don't always have to, even if it feels like it.
I tend to be an all or nothing girl and when a die set comes with options, I feel like I need to use them all or I'm not doing something right. However, the stitching portion of this Spellbinders die set is optional...as in, it's a separate die, and today I didn't use it. What do you think?
The Spellbinders die set in question is called Kaleidoscope Arch and it happens to have a coordinating stamp set too. Today, instead of cutting the stitching holes, I added some detail with tone-on-tone stamping using the floral image in the stamp set. I cut all the layers from yellow cardstocks in my stash and glued them together with liquid glue, including the sentiment banner. Then I popped the whole thing in my MISTI and stamped the floral image with yellow ink.
Next, I chose orange cardstocks and a good green to die cut all of my floral pieces. These are also included in the Kaleidoscope Arch dies. I used gold metallic paper for the flower centers and adhered everything together with liquid glue. You all know I love my critters, so I went digging and found this sweet koala from Pretty Pink Posh Crafty Critters to color and die cut. When I was playing with placement for the florals and koala I thought it would be cut if he help a flower so I cut another one and glued everything in place...again, liquid glue. I really value that wiggle room time you get with that versus a tape runner that adheres immediately.
For my background, I took a piece of white cardstock cut to 4x5.25 inches and layered the Pretty Pink Posh Deco Leaves stencil at an angle. I blended No. 2 Pencil ink with a blending brush, removed the stencil and added more of the same color focusing on the center and fading out. Then I splattered the panel with gold watercolor and let it dry.
Okay, now that everything is dry we can layer everything together. I added foam tape to the stenciled panel and popped it up on a white card base. Then I added foam squares behind the koala and the flower he is holding but that's all. Everything else has layers behind so this little bit of foam keeps everything the same height. I removed foam release paper and added liquid glue to everything else and popped my focal image in the center of the card front.
For finishing touches I added Sakura black glaze pen to the koala's eyes and glossy accents to his nose. Isn't it the cutest!?!
I appreciate you sharing your time with me. Have a fabulous day!
Links to products used or recommended are listed below:


No comments:
Post a Comment