Pages

Pages

Monday, September 30, 2024

Ultimate Mix It Up Monday - Christmas Fun

Hey friends! I'm over on the Doodlebugs blog for our weekly Mix it up Monday but today is seriously the ultimate mix and match with so many companies together and you'd never know. They just work so great!

Lawn Fawn Candy Cane dies

Isn't this just the cutest!!! So easy too! Any order really, you just need that sweet Sunny Studios penguin colored and die cut. The awesome Lawn Fawn candy canes die cut and assembled. I started with red and white but didn't love it until I added the pink. Be sure to play with this die set! I think I'll try some mint green next.

Now, use liquid glue to adhere your candy canes crisscross and then add the penguin to the top.

Lawn Fawn Candy Cane dies

Then stamp and heat emboss your sentiment of choice - the Pretty Pink Posh sentiment strips dies and coordinating stamp sets for the win as usual. I'm tell you, you'll get your moneys worth from these. There is always something that works!

Now, add foam squares and strips behind your images and sentiment strip.

Lawn Fawn Candy Cane dies

Now, we're going to switch to Concord & 9th for an awesome background die. Trim your panel to 3.5x4.75 inches and cut it twice with the Double Stripe Card Front die - once landscape and then again portrait. Then you get this awesome plaid stitching.

I used green cardstock and then ink blended the edges with shabby shutters distress oxide for a little shadow and flicked forest moss ink across the panel for extra interest.

Lawn Fawn Candy Cane dies

Finally, to assemble it all, I popped the background panel up with foam tape on a white card base and then adhered the images and sentiment strip on that. For finishing touches I added black glaze pen to the penguin's eyes and glossy accents to his beak.

Can you believe it? We mixed 4 companies together today and they created the cutest holiday card!

I appreciate you sharing your time with me. Have a fabulous day!

Links to products used or recommended are listed below: 

Sunday, September 29, 2024

National Coffee Day Blog Hop - 2024


Happy Sunday coffee lovers!!  We're super excited to be participating again in this year's National Coffee Day Blog Hop.  We're sharing a fun, coffee inspired project and a chance to win a $25 gift code.

Here are the details:

The hop starts HERE.  

Links can also be found below (be sure to keep reading for a discount code and a chance to win a $25 gift code):

You are invited to the Inlinkz link party!

Click here to enter

We are giving away a $25 Gift Code prize here, but there are lots of other prize opportunities and inspiration from the additional participants.  Please leave a comment on this blog post to be eligible for our prize.  We will randomly select a winner from the comments on October 4th and they will receive a $25 GIFT CERTIFICATE. (please note: we are sorry, but we cannot ship internationally - the giveaway is only open to US shipping).

Be sure to check our winner's post on October 4th for the winner's name and the details for collecting your prize.

Now for our coffee inspiration.  I've created a coffee themed shaker card.


I'm featuring the following products:
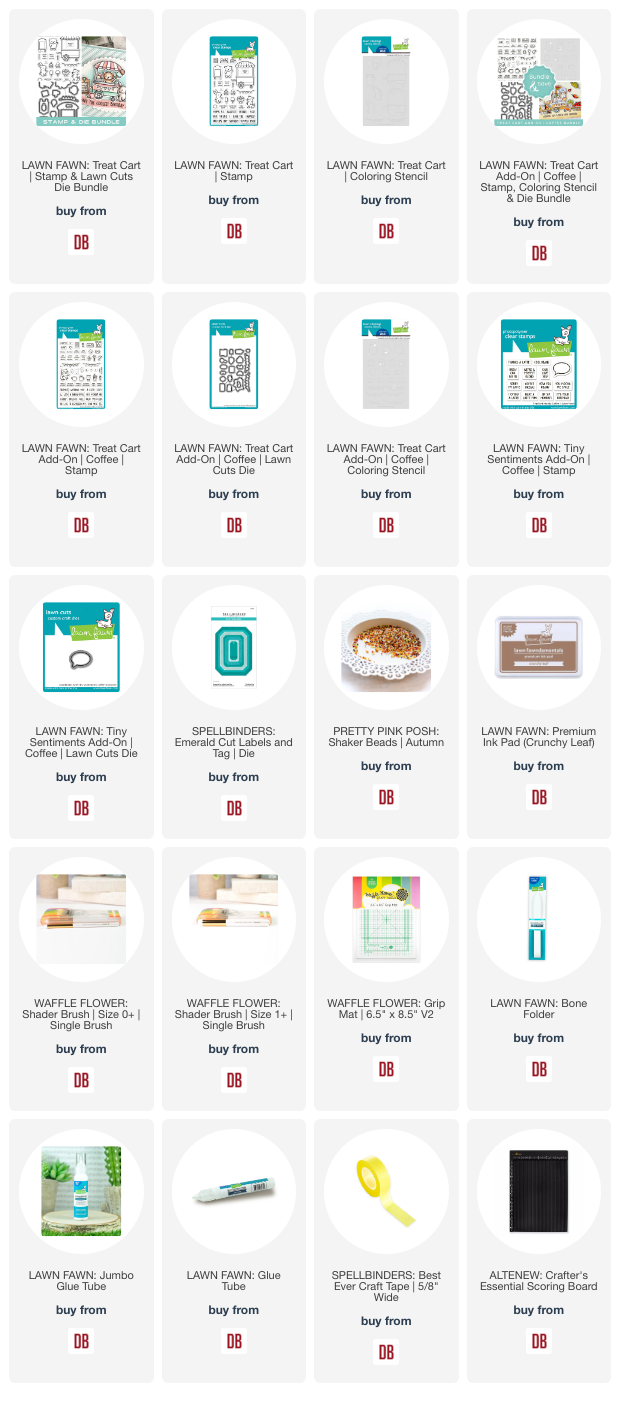
  • Lawn Fawn - Treat Cart | Stamp & Lawn Cuts bundle
  • Lawn Fawn - Treat Cart | Stamp
  • Lawn Fawn - Teat Cart | Coloring Stencil
  • Lawn Fawn - Treat Cart Add-On | Coffee | stamp, Coloring Stencil & Die Bundle
  • Lawn Fawn - Tiny Sentiments Add-On | Coffee | Stamp
  • Lawn Fawn - Tiny Sentiments Add-On | Coffee | Lawn Cut
  • Spellbinders - Emerald Cut Labels and Tag | Die
  • Pretty Pink Posh - Autumn | Shaker Beads


I was thinking of stamping a sentiment below the shaker window but decided to keep it clean and crisp. If you haven't used the shaker beads, you really should give it a try.  The shaker sound is really fun.


Thanks so much for stopping by.  Don't forget to leave a comment for a chance to win the $25 Gift Code.

Links to products used or recommended are listed below:


Thursday, September 26, 2024

Stenciled Balloons and Cute Critters

Celebrate any occasion with these cute cards!

Mama Elephant Up With Love and Concord and 9th Bunch Of Balloons

My first step in creating these cards was to create several balloon stenciled backgrounds using the Bunch of Balloons stencil set from Concord & 9th.  I taped off the edges of my cardstock panels and stenciled in the center with the balloon stencils.  Once I was finished, I removed the low tac tape. This gave me a wide, white border around my balloons.

Mama Elephant Up With Love and Concord and 9th Bunch Of Balloons

I then stamped and colored the images from the Up With Love stamp set from Mama Elephant.  After coloring the images, I die cut them with the coordinating dies.  I cut extra pieces with white cardstock and stacked them behind the colored images.  I love the dimension this gives and I prefer it over using foam tape.

Mama Elephant Up With Love and Concord and 9th Bunch Of Balloons

Next, I cut and layered several sentiments.  Then I was ready to assemble the cards. 

Thanks so much for stopping by!  I hope you were inspired to create something.

-Cathy

Links to products used or recommended are listed below:

Tuesday, September 24, 2024

Faboolous!

 I love designing caffeinated projects.  Here's how I was inspired today:


Coffee Cup Gift Card Holder from Lawn Fawn

This originally started as a shaped card.  I didn't have it on the A2 card base.  I love shaped cards but for some reason, I felt like this particular design needed to be on a card base.

Today's project features:
  • Lawn Fawn - Coffee Cup Gift Card Holder | lawn cuts
  • Pretty Pink Posh - Halloween Mug Additions | dies
  • Pretty Pink Posh - Ghost Holder | die
  • Pretty Pink Posh - Fancy Cake | die
  • Lawn Fawn - Tiny Halloween | stamp
Coffee Cup Gift Card Holder from Lawn Fawn

The sentiment strip has been heat embossed in white.

Coffee Cup Gift Card Holder from Lawn Fawn

The coffee cup lifts up from the bottom to add a note.

Links to products used or recommended are listed below:   
 

Monday, September 23, 2024

Hang in There Mini Scene Card

Happy Mix it up Monday everyone! It's Amanda from Twiddler's Nook. Sometimes creating even a whole card front can feel overwhelming. Whether it's too much coloring of images or too much space to fill. Today I have a fun design to share with you that shrinks your scene space but is really fun and has lots of interest too.

Pretty Pink Posh Batty About You

I started with a few images from Pretty Pink Posh Batty About You. I colored them with copic markers and used the coordinating dies to cut them out. Then I used a dab of liquid glue to adhere my bat to the tree branch.

Pretty Pink Posh Batty About You

Next, used some distress oxide inks to create a spooky sky on a piece of white cardstock. I started with crackling campfire, carved pumpkin and wild honey. After those were blended I went over the whole thing lightly with black soot, then went back over it all with the same colors to blend the black a little. I love the smoky look I ended up with. Next, I spritzed the panel with water and flicked black metallic watercolor on it too.

Pretty Pink Posh Batty About You

I trimmed a piece of black cardstock down to 4.25x3.5 inches and ran it through my die cut machine with the Spellbinders Tiny Dots embossing folder. This part of the design is easy to change up. Use a stencil or patterned paper, or maybe you like it simple and plain cardstock is your jam. Then just cut a 1/4" strip of contrasting cardstock to adhere to the top. It's like a bridge over the seam of your ink blending and the bottom panel. It polishes the design a lot.

Pretty Pink Posh Batty About You

Next, pop everything up on the ink blended panel with foam tape and squares. Placement of the sentiment can vary on this design too. I like the dab of orange at the bottom so that's where my sentiment strip ended up this time. But it often ends up just below the seam strip or even up in the scene itself. Play around with it and see what you like.
 
I appreciate you sharing your time with me. Have a fabulous day!
 
 
Links to products used or recommended are listed below:
 

Thursday, September 19, 2024

Birthday Cards With Bunch of Balloons from Concord & 9th

 The Bunch of Balloons stencils from Concord and 9th make these cards quick and easy! 

Concord and 9th Bunch of Balloons

I picked a few ink colors and stenciled several backgrounds using these fun stencils.

Concord and 9th Bunch of Balloons

I added die cut sentiments and some embellishments to finish the cards.

Concord and 9th Bunch of Balloons
 
Thanks so much for stopping by.  I hope you were inspired!
-Cathy

Links to products used or recommended are listed below:  

Tuesday, September 17, 2024

Argyle Thanks

I sent out a handful of cards the other days and every single one was not postal friendly.  I was thinking of that when I designed this Thank You duo:


Concord and 9th More to Say

These cards feature:
  • Concord & 9th - More to Say | die
  • Pretty Pink Posh - Argyle | layered stencils
Out of habit, I was initially reaching for foam adhesive for the sentiments.  I didn't use it for this pair of cards just to be able to say that they are postal friendly, meaning only one forever stamp.

Concord and 9th More to Say

I'm in fall mode and perhaps even in an 80's mood with the argyle.  My overall Concord & 9th color palette:
  • Tidepool
  • Nutmeg
  • Wheat

Concord and 9th More to Say

Thanks for stopping by!

Links to products used or recommended are listed below:

Monday, September 16, 2024

Using Color Palettes to Extend the Use of Products, Fall Vibes

Welcome to another Mix it up Monday for the Doodlebugs blog! This is Amanda from Twiddler's Nook. Today I'm playing with a few different die sets that were released during other times of the year but if you just change the color palette you use them with, it's fun and easy to use them all year long.

Concord and 9th Markered Messages

I started with this great Love You die from the Concord & 9th Markered Messages die set. I cut some strips from my chosen color palette. I was thinking soft fall vibes. I glued those to a piece of cardstock and cut the "shadow" circle from that stripes. Then I chose a chocolate cardstock from my stash to cut the word portion out. I used foam squares to adhere the two together.

Concord and 9th Markered Messages

For my background, I wanted to tie the brown in more so I cut the Pretty Pink Posh Pierced Leafy Vines background die from it and glued that to a white card base. To separate the sentiment from the background panel, I used shabby shutters distress oxide ink on a piece of cardstock. I spritzed it with water and flicked white paint on the panel before popping it up with foam tape.

Concord and 9th Markered Messages

Last, I went digging for leaves that fit my vibe to adorn my sentiment panel. I found this one in the Pretty Pink Posh Winter Mug die set. I cut it from a few colors in the stripes and glued them in place with liquid glue. To finish off the design I found a few baubles that resembled water drops to glue to my leaves. 

I appreciate you sharing your time with me. Have a fabulous day!

Links to products used or recommended are listed below:


Thursday, September 12, 2024

Oh Happy Day...Whoosh Kites Stamp & Die From Lawn Fawn

Flying kites takes me right back to being a kid!  I grew up in the High Desert of Southern California where we had no shortage of wind.  I remember flying kites so high, you could barely see them.  Such fun!

Lawn Fawn Woosh Kites

 After coloring and die-cutting these adorable images, I created some simple, ink blended backgrounds.

Lawn Fawn Woosh Kites

I then added a sentiment to complete the cards.

Lawn Fawn Woosh Kites

Thanks so much for taking a peek!  I hope you were inspired.

-Cathy

Links to products used or recommended are listed below:  

Tuesday, September 10, 2024

Eat Cake

I should be designing more more birthday cards so when I saw Concord & 9th August Release, I knew they would become a staple.


I'm featuring these products:

  • Concord & 9th - Cut the Cake | die & stencil bundle
  • Pretty Pink Posh - Birthday Words | stencil
  • Lawn Fawn - Gold | metallic cardstock
The gold glitter strip is from my stash but the shop does carry:
  • Spellbinders - Gold Assortment | paper

I used the following Concord & 9th inks:
  • Ballet Slipper
  • Creamsicle
  • Sprout
  • Lilac
The Cut the Cake stencils really are so clever! So easy to combine the colors.  I decided to only stencil the Birthday Words stencils on the lower portion of the design, to not take away from the sentiment.


Thanks for stopping by!
 
Links to products used or recommended are listed below:

Monday, September 9, 2024

Spooky Wishes, Using Repeat Dies to Create a Fun Background

Hey friends! It's Amanda from Twiddler's Nook and I'm back to my usual antics with a fun Halloween card for Mix it up Monday. Today we're playing with repeat die cuts to create a fun background on your card.

Pretty Pink Posh Ghost Holder

I've had the Mama Elephant Circle Combo dies out quite a bit lately so they were my first to reach for with the variety of stitched circle sizes in that set. I chose 3 fabulous colors that seem to be my Halloween palette for 2024 and cut the 3 smallest circles from each one. I arranged them on my 4x5.25 inch piece of white cardstock and used liquid glue to adhere them in place. I trimmed off the excess of the circles hanging over the edge and splattered the panel with orange metallic watercolor.

Pretty Pink Posh Ghost Holder

Next, I pulled out some of the Pretty Pink Posh Halloween release and cut bats from the Ghost Holder die set. I used mini foam squares to pop them up all over my design. Then I used a sentiment from the new Halloween Corners stamp set using Distress Oxide ink in kitsch flamingo and spiced marmalade. I love that this stamp set has dies for the sentiments along with the images.

Pretty Pink Posh Ghost Holder

I popped my sentiment up along with one final bat. Then I popped the panel up one an A2 size piece of black cardstock and used liquid glue to adhere the whole thing to a white card base. Sometimes I use black card bases with another white insert inside but I'm running low on black cardstock we have to ration things until my order comes. haha!

How do you feel about the abundance of non-traditional color palette for holidays lately? I feel like it's getting more popular every year and I'm absolutely here for it!

I appreciate you sharing your time with me. Have a fabulous day!

Links to products used or recommended are listed below:

Thursday, September 5, 2024

Creating Simple Layered Cards With Pretty Pink Posh Flower Bouquet

Hello crafty friends.  I know everyone is excited for all the new fall and holiday products, but I'm not ready to abandoned summer yet.  It takes so long to get here in the PNW, I'm going to hang on to every last day of sunshine and enjoy the beautiful flowers in my garden, the inspiration for today's cards.

Pretty Pink Posh Flower Bouquet
I stamped and colored the images with Copic markers.  After coloring my images I added them to my card bases with some additional layered die cut frames.  

Pretty Pink Posh Flower Bouquet

I mixed up the sentiments and added a die cut "thanks" to one of the cards and a stamped sentiment for the other.

Pretty Pink Posh Flower Bouquet

Thanks so much for stopping by.  I hope you were inspired!

-Cathy

Links to products used or recommended are listed below: