Pages

Pages

Wednesday, August 31, 2022

Using Copics to Add Color to Die Cuts....


Hello and happy Wednesday everyone. I am sharing this mermaid-themed bookmark with you today. I used the pretty Mermazing Mermaid die from Lawn Fawn.


I love reading (in case you didn't know that about me, lol) so creating fun and interactive bookmarks is something I love to do. I began by die-cutting the layers to create the mermaid. I used Copic markers to add colors to each section of the mermaid. 
Copics Used: 
Hair: E49, E47, E44, E43, E41
Skin: E50, E51, E21, E23, R01, RV42
Fin and top: YR21, YR23, E15, E08, YR27, E35


I then used the Bookmark It die set to create the bookmark base. I added color to both layers using Distress Inks. I used Cracked Pistachio, Peacock Feathers, Broken China, and Chipped Sapphire. For the sand area, I used Gathered Twigs and Brushed Corduroy


I then used the flower layers from the Picked Posie die set from Concord & 9th to create the clamshell and the seaweed around the mermaid along with the greenery from the Backdrop Tropical Leaves die set. I added a bit of color to the 'clamshell' and the seaweed using Rustic Wilderness Distress Ink.


To create the frame I used one of the smaller rectangles from the Large Mini Slimline Stackables dies set to die-cut the opening from one of the layers created using the Bookmark It die set. 


I then heat embossed the sentiment from the Paint-A-Flower Hydrangea stamp set onto the bottom layer of the bookmark. Next, I heat embossed the sentiment from the Dream Big stamp set onto a vellum speech bubble die cut using the speech bubble from the Bookmark It dies set.


I hope you enjoy the card I created to share with you today. Thank you so much for taking the time to stop by. I hope you each have a wonderful and blessed day. Please feel welcome to visit me on my blogIG or Pinterest.

Links to products used or recommended are listed below: 

Monday, August 29, 2022

Enhancing Diecuts with Color and Bling


Hi, everyone!  Toni here with you today sharing a happy little retro card featuring the hearts from Avery Elle Fabulous Shapes.

The card was really simple to make with a background made using the MFT Mini Cloud Edges Stencil with Distress Oxide Picked Raspberry and Mustard Seed.


I then cut out the hearts and sponged the layers in varying shades of Distress Oxide Peacock Feathers and Salvaged Patina with a splash of that fab Picked Raspberry for the center.

To jazz them up I used Glossy Accents and Clear Wink of Stella on some of the layers.  Isn't that fun?


For the final step I added the Pretty Pink Posh Smile die cut from black cardstock.

I'll see you again soon.  If you'd like to check out my other creations in the meantime, you can visit my blog, Frankie Helps Craft, my Instagram, or my Pinterest Board.  Have a great rest of your day!

PRODUCTS USED AND/OR RECOMMENDED

Friday, August 26, 2022

A day at the Beach with Honey Bee!


We live less than a mile from the beautiful shore of Lake Michigan - one might think we spend every day there in Summer - think again!  Isn't that a shame?  Being in the sun isn't something we love anymore [I never did learn how to swim] but I do love a beach scene as much as the next crafter!!  

Say hello to Honey Bee's Shoreline Scene Builder set of dies!  and my look at the scene from the shade of the leafy growth!


I adore a completely neutral card!!  Lucky for me there were many to choose from
in this gorgeous 6x8.5" Vitamin Sea paper pack from Honey Bee
AND some pretty beach-appropriate sentiments in their
Seas the Day set, too!  This one is tucked inside...


Check out the fabulous detail on this Honey Bee Waves Pierced A2 cover plate!

You'll find me hiding among those Mama Elephant Leafy Cover somewhere!!
Or maybe we've taken a walk on one of the many dune trails?  Or we're dragging a 
big piece of driftwood home - like this one!!  A keeper for sure!

Hope you have a great weekend, no matter what is on your agenda!  Thanks for stopping in!
=] Michele

Links to products used or recommended are listed below: 

Wednesday, August 24, 2022

Puppy-Themed Birthday Card....


Hello and happy Wednesday everyone. I am sharing this pets-themed birthday card with you today. I used the super cute and versatile Tiny Gift Box Dog Add-on dies from Lawn Fawn.


Just like the card I created to share with you before, I created this card for another one of my niece's birthdays. GG loves dogs, especially her puppy Chip and our dog Daisy. I began by die-cutting the layers from the  Tiny Gift Box Dog Add-on die set to create 'Chip', 'Daisy', and a friend. 


I then used the largest rectangle from the Mama Elephant Basic Rectangles die set to die cut the base layer for the card. I also die-cut layers from green and gray cardstock to create the ground and grass. To create the grass layers, I used the grass from the Mushroom Border die set, and the to create the ground area, I used the  Slimline Simple Stitched Hillside die set. 


I then added color to the green layers using Twisted Citron and Mowed Lawn Distress Ink, and a bit of Rustic Wilderness Distress Oxide. For the sky, I added Broken China, Peacock Feathers Distress Inks along with a bit of Blueprint Sketch Distress Oxide ink. For the ground area, I used Gathered Twigs, Brushed Corduroy, Pumice Stone, and Black Soot Distress Inks. Next, I heat embossed the sentiment from the Scripty Bday stamp set onto a vellum cut circle and layered it with a scalloped frame to create the shaker part. I then heat embossed the word 'let's' from the S'more The Merrier stamp set onto a strip of vellum. I then die cut the phrase 'Pawty' using the Tailgate Alphabet from Honey Bee Stamps. For the speech bubbles, I used the Happy Village stamp set along with the sentiments from the Simply Celebrate Critters Add-on


I hope you enjoy the card I created to share with you today. Thank you so much for taking the time to stop by. I hope you each have a wonderful and blessed day. Please feel welcome to visit me on my blogIG or Pinterest.

Links to products used or recommended are listed below:  


Monday, August 22, 2022

Multi-Layer Floral Dies


Hi, everyone!  Toni here with you today sharing what I think is a gorgeous garden-themed birthday card that I personally would love to receive (hint, hint!).

I started the card by using the Pinkfresh Studio Geo Blocks Hot Foil Plate with a rubber mat to emboss the design on my card front.  I really love the effect of embossing with hot foil plates since the lines are thicker resulting in a more 3D look.


Next I cut out then sponged the Honey Bee Lovely Layers Wildflowers with Distress Oxide Mowed Lawn, Rustic Wilderness, Wilted Violet, Blueprint Sketch, Ripe Persimmon, and Barn Door.  I modeled the poppies after my own.  I don't have the purple flowers in my garden--not even sure they come in that color!


For the sentiment I used the Honey Bee Seeds of Kindness stamp along with the coordinating Honey Bee Seeds of Kindness Die.  I hadn't realized that the label was a two-part die to create a dimensional layered effect--love!


I'll see you again soon.  If you'd like to check out my other creations in the meantime, you can visit my blog, Frankie Helps Craft, my Instagram, or my Pinterest Board.  Have a great rest of your day!

PRODUCTS USED AND/OR RECOMMENDED

Friday, August 19, 2022

Ethereal Roses without pruning!

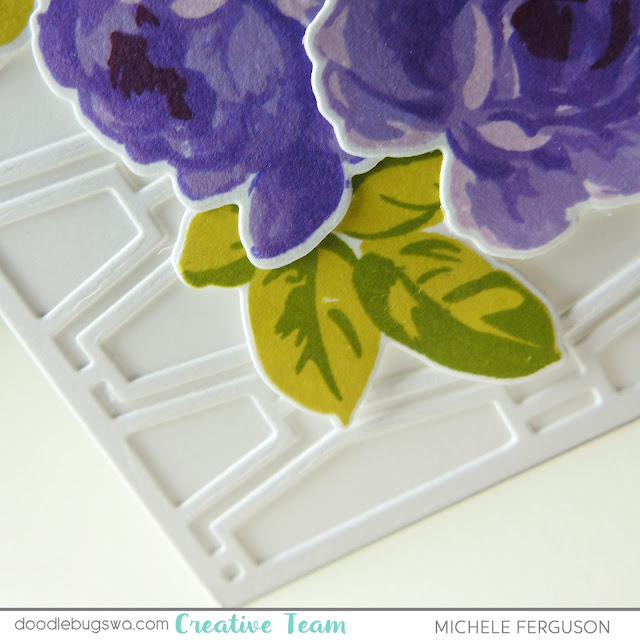
I am becoming a big fan of roses - not in my garden mind you because they do require work - but I was delighted when Altenew introduced their Ethereal Roses - a bonus that they come in a bundle, with no thorns to be poked by or snippers required!  

I got out a few Altenew ink-cubes sets and got to layering these roses - mine do get better with several stampings!

Purple roses?  YES PLEASE!!  Not one bit sure they exist IRL but they do in MY crafty world!


Please be sure to check out the examples Altenew gives in their packaging!  that's what I did today, with a twist ... their Mid-Century cover plate was a fabulous place to
plant my purple roses.  That purple foiled Pinkfresh Studio Scripty Words sentiment
fit perfectly, too!


Not a fan of purple?  How about a few in orange-y reds?
LOve that this set comes with a few more of their label-type sentiments - so easy
to cut without needing a die!


So, are you a rose fan?  There are so many to choose from at the Doodlebugs shop and they are all just gorgeous!

Thanks for stopping by today - hope you have some fun blooming in your craft studio this weekend!
=] Michele

Links to products used or recommended are listed below: 

Wednesday, August 17, 2022

Super Fun Animals using Tiny Gift Box Add-on Dies....


Hello and happy Wednesday everyone. I am sharing this super fun animal-themed birthday card with you today. I used the super cute and versatile Tiny Gift Box Add-On dies from Lawn Fawn.


I created this card for one of my niece's birthdays, she loves animals, especially cheetahs. I looked through the Tiny Gift Box Add-On dies to see what I could use to create a cheetah, a giraffe, and a lion.
I began by using the Tiny Gift Box Unicorn & Horse Add-On die to create the Giraffe. For the spots, I used the patches/spots from the Tiny Gift Box Cat Add-on ( I also used the smaller of these to create the spots on the 'cheetah').  To create the lion, I used the Tiny Gift Box Hedgehog Add-on. I realized after that I should have used the Tiny Gift Box Skunk Add-on because of the extra hair that could be used on the top of the head. To create the cheetah, I used the Tiny Gift Box Cat Add-on along with the small circles from the Little Flowers die set. 


I then used the Fancy Lattice Backdrop die to die cut the layering panel for the shaker card. Next, I die cut the base for the card, along with layers to create the ground and grass, and the leaves along the top of the card from green, kraft, and light blue cardstock. I used the Slimline Tropical Leaves die to create the border for the top. To create the grass layers, I used the grass from the Mushroom Border die set, and the Slimline Grassy Hillside die set. To create the ground area, I used the  Slimline Simple Stitched Hillside die set. For the birthday hats, I used the Peek-A-Boo Birthday Tag Toppers.


I then die cut the phrase Hooray using the Hooray die from Avery Elle. Next, I heat embossed the sentiment from the Inside Birthday Greetings stamp set onto a strip of vellum. 

I hope you enjoy the card I created to share with you today. Thank you so much for taking the time to stop by. I hope you each have a wonderful and blessed day. Please feel welcome to visit me on my blogIG or Pinterest.

Links to products used or recommended are listed below: 

Monday, August 15, 2022

Combining Dies with Stencils


Hi, everyone!  Toni here with you today sharing a card using up the last of the Lawn Fawn Spring Blossoms Background Layering Stencils seasonal card fronts I had made up.

For this one I used Distress Oxide Mustard Seed and Mowed Lawn and two of the three stencil layers.


I sneakily cut out the Honey Bee Flip Flop Builder dies out of the card then hid the missing bits with a green panel.  Why waste all that pretty paper, am I right?

I added a Waffle Flower A2 Layer vellum panel as well as Lawn Fawn Stitched Teapot blossoms to tie it all together.


The simple Honey Bee Phoebe Alphabet sentiment is embossed in black to tie in with the flip flop straps.

I'll see you again soon.  If you'd like to check out my other creations in the meantime, you can visit my blog, Frankie Helps Craft, my Instagram, or my Pinterest Board.  Have a great rest of your day!


PRODUCTS USED AND/OR RECOMMENDED

Friday, August 12, 2022

Adding extra detail to your stenciling!

It's FRIDAY!  Isn't that still the best feeling - even when we're retired! LOL   Michele here, and I have a fun way to add a little extra to a pretty stenciled image!  

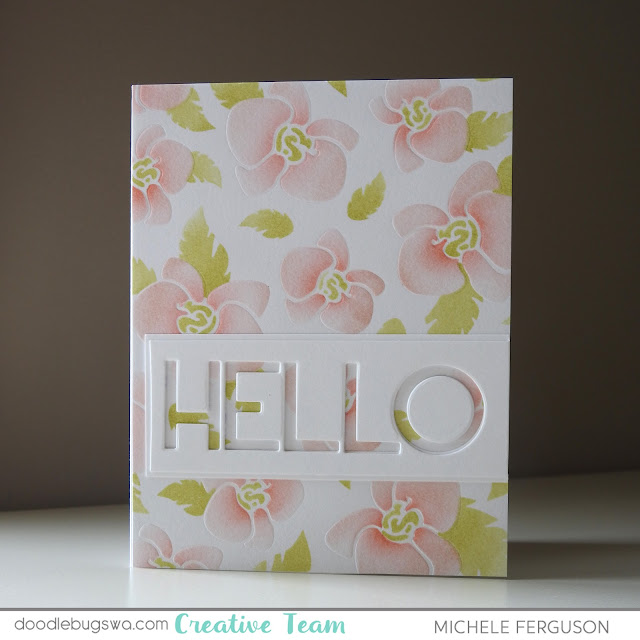
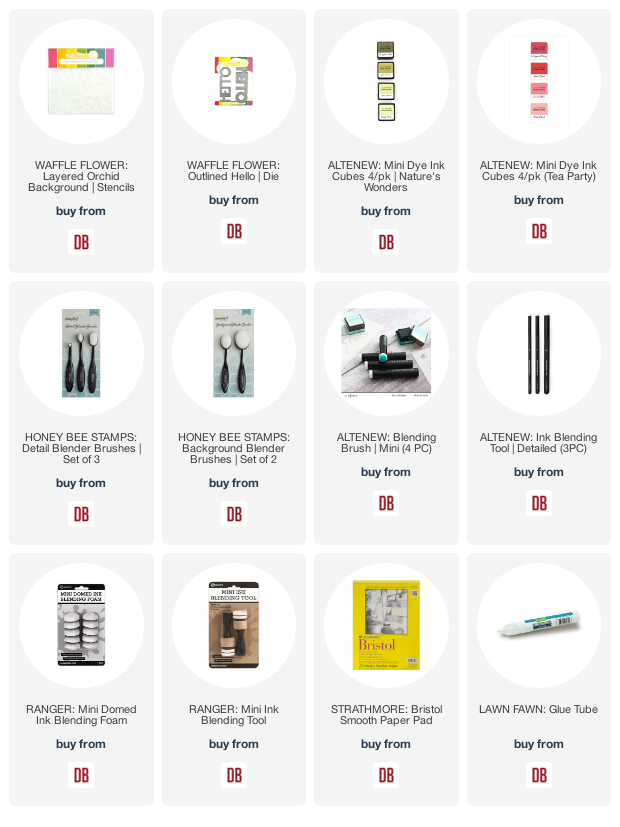
I set up my stenciling station with Waffle Flower Crafts Layered Orchid Stencil Duo a half-sheet of Bristol cardstock, and just two inks today.  It's easy to add shades of one color by the amount of pressure used. My favorite stenciling tool happens to be brushes like these from Honey Bee - but you do you!  

THIS is where the fun comes in... after you're happy with your stenciling, dry emboss it!  I created my sandwich like this:  fun foam 1st, then stenciled image, and finally one of the stencils from the set - today I used the orchids!  I ran it through my die-cutting machine and voila!  

It's a subtle texture, but I didn't want to put too much pressure on the stencil using the embossing mat that came with my Platinum 6 machine.  Kinda pretty huh?  I love these darling orchids, and also creating an all-over design for my card... oh, I didn't even want to cover a bit of it up, so I kept my sentiment simple and cute...


A simple Outlined HELLO from Waffle Flower Crafts got the job done beautifully
and allows those orchids to peek through!  It was cut [twice] with the same Bristol card so
my whites were all matchy-matchy! 

I hope you'll say hello to this technique soon!
=] Michele

Links to products used or recommended are listed below: 
Wednesday, August 10, 2022

Layering Die-Cuts....


Happy Wednesday everyone. I am sharing this super fun shaker card with you today. I used the Simply Hexagons and the beautiful Magnolia Perfect Pairings dies. 


I began by using the largest rectangle from the Basic Rectangles Creative Cuts die set to die-cut the base of the card and the clear layer to create the shaker. I then used the Simply Hexagons die to die cut the frame for the shaker. Next, I used the  Magnolia Perfect Pairings die to die cut the magnolia layer. I then glued vellum under the open flower and leaves. I then used the Honey Bees Paper Piecing die set to create the little bees. 


Next, I added color to the base layer of the card using Cracked Pistachio and Peacock Feathers, and a bit of Mermaid Lagoon Distress Inks. For the bees and hexagon shapes and the flowers, I used Squeezed LemonadeMustard Seed, Wild Honey, and Rusty Hinge Distress Inks. For the leaves, I used Twisted Citron and Mowed Lawn Distress Inks. 


Next, I used the Tailgate Alphabet set to die-cut the letters to create the 'B..ZZZ' from black cardstock. I then stamped the sentiment from the Love Poems stamp set onto one of the hexagons. 

I hope you enjoy the card I created to share with you today. Thank you so much for taking the time to stop by. I hope you each have a wonderful and blessed day. Please feel welcome to visit me on my blogIG or Pinterest.

Links to products used or recommended are listed below: 

Monday, August 8, 2022

Using Layers to Create Diecut Shadows


Hi, everyone!  Toni here with you today sharing a tropical card perfect for summer.


I used My Favorite Things Party Time 6x6 Paper as the background and realized that the Sunny Studio Summer Greenery diecuts in greens didn't pop as much as I thought they would.  

Recut in a different color? Ick. Add a white "shadow?"  Yes!


The offset white leaves beneath helps to differentiate them from the background.  It also pulls the white from between the designer paper stripes and ties into the white sentiment I had cut from Lawn Fawn Henry's ABCs. Nifty!


I'll see you again soon.  If you'd like to check out my other creations in the meantime, you can visit my blog, Frankie Helps Craft, my Instagram, or my Pinterest Board.  Have a great rest of your day!

PRODUCTS USED AND/OR RECOMMENDED