Saturday, May 31, 2014

Paper Smooches- Refelections Stamp Set

Love the clean look of this card Emily created last week using the Reflections Stamp Set from Paper Smooches.

Enjoy your Saturday!


You can find other cards we created using the same set HERE,  HERE,  and  HERE.

Thursday, May 29, 2014

MFT Stamps- Watt's Up

We received a shipment of new dies and stamps from MFT Stamps last week.  The light bulb and "Watt's Up" stamp set was my favorite!  Isn't that light bulb adorable?  The sentiments on the set coordinate wonderfully with the light bulb and many of the other dies I have in my collection.


I used Tim Holtz Distress Inks to create a watercolor background, on Mixed Media paper, for this card.  The light bulb is cut from vellum.  The additional pieces were cut from white cardstock and colored with Copic markers.  I added some Glossy Accents to the red portion of the heart and the clear Wink of Stella to the grey pieces (its hard to see the shimmer in the photo).  The filament was cut from silver glitter paper.
I also added clear Wink of Stella over he word "Brighter".  It's really hard to see in the image.  However, it does have a nice shimmer.

Here's an image of the sentiment stamp set.


Heat Embossing Inspiration

Here's  a fun technique to give a try.  Emboss a die cut image with an embossing folder and your Big Shot machine.  Then, ink the raised areas of the paper with a brayer and some VersaMark ink, and heat emboss with white or clear embossing powder.  Color with inks.  The embossed areas will resist the ink.

I've been playing around with this technique, and thought I'd share one of the cards I created.  I've included a few pictures of my process and the end of this post.


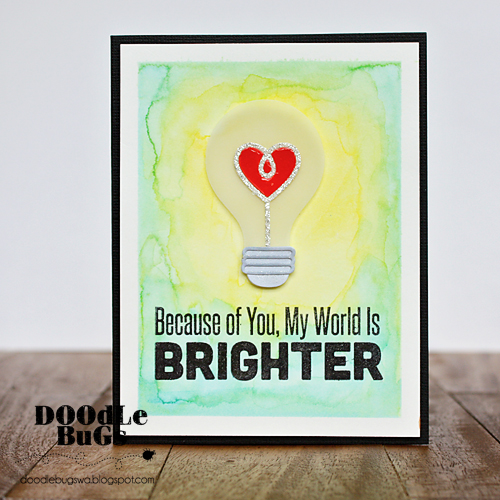
Here's a close up of the embossed, diagonal lines.  You could also emboss the heart with clear embossing powder.  I used Glossy Accents here.

The sentiment stamp is from the NEW MFT Stamp set "Watt's Up?"  It's designed to coordinate with the Light Bulb  Die-Namics die.  However, it has some great saying that work great with some of the other dies in my collection.

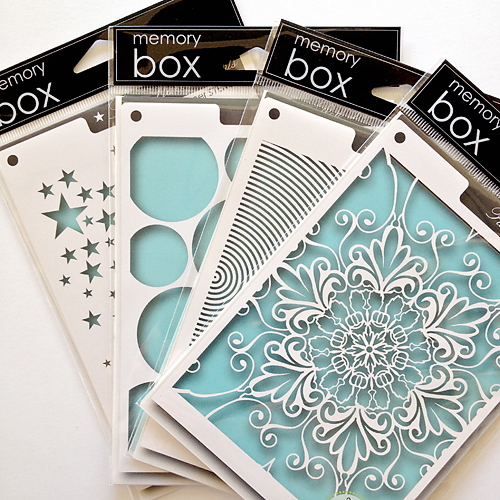
Here's a few images of the process I used to create the card above.  I cut the Cityscape from some Mixed Media paper using the Cityscape die from Memory Box.  I then embossed it with a diagonal embossing folder.  I inked up the brayer with VersaMark ink, and rolled it across the raised portions.

I covered the die cut images with white embossing powder (you could also use clear), dumping the excess powder back into the jar.  The powder will stick to the inked areas only. I then melted the powder that stuck to the raised areas with my heat tool.

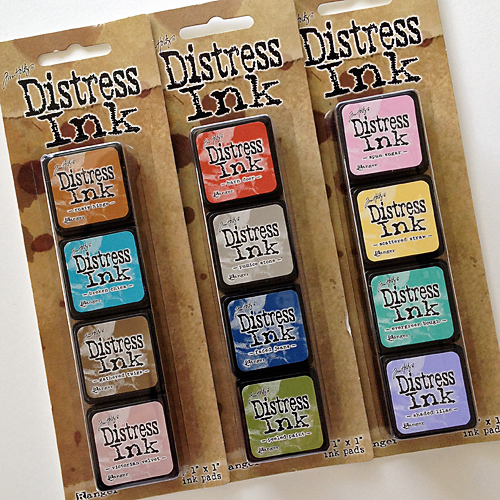
I used Tim Holtz Distress Ink markers to add a watercolor effect to the cityscape.  To do this, I colored directly onto my non-stick craft mat with the marker.  Added some water to the color with my brush, then added the color to the cityscape.  The embossed areas will resist the color.

Give it a try.  I've been trying it with all sorts of different embossing folders.  It makes great backgrounds for simple cards!!

Wednesday, May 28, 2014

What's New Wednesday


Have you seen the new MFT stamps and dies we received last week?  They're so much fun!  Here's a peek at a couple cards using the Light Bulb die and the Sea Life stamp set.  Watch the blog this week for more cards using these two sets.


We also received some new products from Studio Calico.  We're loving the farm and garden wood veneers and the cork stickers.

Don't miss our Saturday Demonstration this weekend.

Cathy will be demonstrating some watercolor techniques and giving you a preview of what you'll be learning in this summer's Watercolor Workshop.  Stop in anytime between 10AM and 12PM or 1PM and 3PM.  We'll also be offering special pricing on one of her favorite items during the demo.  See you on Saturday.


Class Updates:

A complete list of all classes can be found on our WEBSITE.  Be sure to click on the tab for classes located at the to of the page.

Copic Technique Class
We still have some space left in our June Copic Technique Class.  Join us.  You'll learn tips and tricks for coloring folds and pleats in clothing.  We'll also be practicing a simple technique for creating a grassy base under your images.  Class details can be found HERE

Family Legacy Box
Create a beautiful Shadow Box Book using one of Tim Holtz newest configuration boxes in this Family Legacy Shadow Box class.  More images and class details can be found HERE.

NEW Watercolor Workshop
This workshop is limited to ONLY 8 students.


Don't miss our FREE "Make and Take" this Friday.  We'll be using the new embossing powders to create the Father's Day card shown below.   Our FREE "Make and Take" is available between 5PM and 7PM, while supplies last.  See you on Friday!


Fun Stuff You May Have Missed!

1.  Just in case you missed the cute cards we posted on our blog last week.  We've created links to them HERE  and HERE,
2.  Don't miss the fun heat embossing technique we posted HERE.
3.  Ryan has been busy painting our Studio wall.  You can see what he did HERE.

Tuesday, May 27, 2014

MFT Stamps- Blue Skies Ahead


Today we have a card using the Blue Skies Ahead stamp set and the Cloud Cover Up die from MFT Stamps.


Emily used the new silver metallic embossing powder for the sentiment.

She secured the die cut, cloud background to the card with foam dimensional dots.


Monday, May 26, 2014

FREE Friday "Make and Take"


Join us on Friday for our FREE "Make and Take".  We'll be playing with some of the new embossing powders from Ranger to create the Father's Day card shown below.  Our "Make and Take" is available between 5PM and 7PM, while supplies last.


Saturday, May 24, 2014

Heat Embossing Inspiration

Here's some heat embossing inspiration for those of you participating in our Creative Challenge this month.  You can find more information regarding our Creative Community group and our monthly challenges HERE.

I decided to use the popular Blissful Butterfly die from Memory box for this card.


I cut the die from white cardstock.  I then covered the butterfly frame portion in VersaMark ink, covered it with gold embossing powder, dumping the excess powder back into the bottle.  I used my heat tool to melt the powder.

I then covered the butterflies with the VersaMark ink.  With a small spoon, I sprinkled yellow embossing powder in the centers of the butterflies, dumping the excess powder back into the bottle.  I then covered the remaining portion of the butterflies with red embossing powder, again, dumping the remaining powder back into the bottle.  I melted the powder with my heat tool.

I embossed a sentiment in gold and adhered the frame and butterflies to the front of the card.


Friday, May 23, 2014

Memory Box- Blissful Butterfly

The blissful butterfly die is back in stock.  So, I thought I'd share a few cards Emily and I made last week.


Stop in and get it before it's gone again!

Thursday, May 22, 2014

Studio Wall Art

We recently saw a post on Alisa Burke's web site.  She painted one of her walls with some fun, floral patterns.  We loved it, and decided something similar would look great on our studio walls.   So, Ryan grabbed his black Montana marker and went to work.  He free handed each of the flowers and colored in the open areas with the maker.  Doesn't it look amazing?


Wednesday, May 21, 2014

What's New Wednesday


We have some great, new products this week!

New stencils (and dies) from Memory Box.

Fun chalkboard products for your next party or event.

I'm loving the colors in this new collections from Pebbles, Inc.

New colors for the Mini Distress Inks from Tim Holtz.

Featured Product

We've been playing with the Color Bloom Sprays and Heidi Swapp stencils this week.  Stop in and try them out!

FREE Friday "Make and Take"


Join us on Friday for our FREE "Make and Take".  Available between 5PM and 7PM, while supplies last.


Summer Workshop

We still have space on Sunday, for our Summer Workshop.  Give us a call if you'd like to sign up.

Fun stuff you may have missed this week:

1.  Quick and Easy cards using the "Hello Sunshine" collections from Pink Paislee.  Find them HERE. 
2.  Find some heat embossing inspiration HERE.
3.  Dress up your canning jars with the Tim Holtz Distress Paints.  You can find more information HERE.
4.  Art Journal inspiration can be found HERE.
5.  Images of Ryan's demo can be found HEREHERE, and HERE.


Tuesday, May 20, 2014

Pink Paislee- Hello Sunshine Cards

I just love the Hello Sunshine collection from Pink Paislee!  The puffy stickers were the perfect accent for the watercolor backgrounds I created!

Here's a close up of those puffy stickers!


I used Inktense pencils and a water brush to create several 3"x4" watercolor backgrounds on my favorite Mixed Media paper from Strathmore.


I added the puffy stickers and a sentiment from the "Blue Skies Ahead" stamp set from MFT Stamps.


The background papers are from the "Hello Sunshine" 6"x6" paper pad.


There are enough stickers to create 6 or 8 adorable cards.  Super quick, and super easy!


Here's a look at the supplies I used.  Not shown are the stamp set, ink, and paper pad.